

Fixing a keyed car on your own is challenging, but not impossible. The damage to the body of your car from being keyed is typically deeper than regular wear and tear, or even a dent. However, taking your keyed car to a body shop can cost a small fortune, so a DIY job might be your best bet.
You can repair a keyed car on your own, but it requires a few tools and a lot of patience. It’s up to you to decide if you’d rather spend the money to have your keyed car repaired or take the time do fix it yourself. A DIY keyed car repair isn’t out of reach, but it will take time and patience.
If your car has damage from being keyed, and you’re wondering what a DIY repair job will look like, stick around. This article has everything you need to know about how DIY keyed car repair works.
Table of Contents
How to Repair a Keyed Car On Your Own
If you’ve decided to take on your keyed car repair, you’ll be happy to know that this a fairly straightforward repair.
First, you will need to obtain the proper equipment to complete this repair. It boils down to cleaning and polishing materials, sanding materials, and painting materials.
Many of them you may already have in your house! Then you will have to follow a few simple steps to take your car from scratched up to shining!
Equipment
There are two options for obtaining the equipment you need -premade kits or your local hardware store. There are different repair kits on the market for people who are fastidious about maintaining their car’s appearance.
Most DIY repair kits are designed to fix all manner of scratches and nicks. It comes with a special blending solution for correcting mistakes made during the process and is guaranteed to come with the exact paint color that you need.
If buying a kit isn’t in the cards, you can still repair the damage on your own. Most of the supplies needed can be purchased at your local home improvement store. Some items, like a bucket and sponge for washing the car you already have on hand; other things like the paint you will likely need to purchase.
To get the job done right, you’ll need
- A bucket, sponge, and microfiber cloth
- Masking tape
- Gloves and eye protection
- A sand block and grain paper of varying gradients
- Primer
- Paint
- A fine-tipped brush
- Clearcoat
- Polish or wax
- Lots of Time and Patience!
[googleadsycc adunit=”inarticle”]
Car Washing Materials

These are the materials that you are most likely to have on hand at home. Grab a bucket and your favorite sponge for washing your car.
After you’ve done this step, you will still need to use the soapy water for wet sanding your car. You can keep the bucket around, or you can prepare a fresh soapy water solution in a spray bottle
You will also need several microfiber cloths. Use microfiber instead of a regular towel so that you won’t leave behind lint and streaks when drying your car.
You may also want to consider grabbing a heat gun or hairdryer if you have one handy; this will help speed up the drying process in certain steps.
Masking Tape

The masking tape is used to tape a perimeter around the scratch on your car. This will help protect your car from rogue paint or sandpaper. Since you don’t want to damage the rest of your car, it is important to use tape that will adhere properly without scratching the paint any further. You should also consider grabbing some old ads or newspapers to protect the rest of your car.
Gloves and Eye Protection

These are optional but are highly recommended since you will be working with sandpaper and paint. The gloves will protect your hands from the sanding block and will make cleanup much easier.
Goggles are best used on windy days to keep the blowback from sand and paint out of your eyes. If you are highly sensitive to fumes, consider wearing a simple face mask to prevent breathing them in.
Sandpaper

Evenly sanding the scratched area is key to a smooth finish. Depending on the depth of your scratch, you will need at least two to three different gradients of sandpaper, ranging from 1000-3000.
These are all ultrafine grades of sandpaper, which you will use to carefully even out the scratch with the rest of the paint.
While having a sanding block is optional, it is highly recommended for the best results. A sanding block allows for better control of the paper and will help protect your hands from getting scraped. If you don’t have a sanding block, you can use the paper alone, but you will need to be extra cautious.
Primer and Paint

If you have a very deep scratch, you will need to prime the scratched area before painting. The primer will help fill in any remaining space that wasn’t sanded away and will create a smooth surface for the paint.
Primer is optional if you have a very shallow scratch, but you should still have it handy either way in case you overspend or if you just want an even application of paint.
Choosing the right paint is the most important part of this repair. The incorrect color will still make the affected area stand out. For best results, find the exact paint color that was used on your car.
This can be found online and in your owner’s manual, if you have it. Some cars will have a color code somewhere in the engine bay, door sill or on the VIN tag. There are quite a few options for applicator tips; a spray can is recommended, but an applicator tip works well for small scratches.
Even if you use a spray can, you still need a fine brush to help even out the paint so that there are no harsh lines. The brush does not need to be expensive, but you do want the brush to be in condition. That way, there is no risk of loose bristles setting in your time-consuming paint job!
Clear Coat

Clearcoat is essentially a layer of clear paint. Car manufacturers use it to seal the paint on your car and give it a glossy finish. While small dings and scratches don’t always penetrate your clear coat, keying almost always will. Any car produced in the last thirty years will have a layer of clear coat that you will need to replace. If your car is any older than that, consult your manual before applying a clear coat to the affected area.
Polish or Wax

After you’ve repaired the scratched area, you will want to make the car shine! For this step, you will need polish and wax. A non-abrasive polish will help minimize the appearance of scratches and return lost shine to paint.
Since polish actually removes a fine layer of paint from the car, only use polish if you are using it on the whole car. This is recommended to even everything out but is not required if you are pressed for time.
Wax makes the paint shine and smooths everything out. For minor scratches, you will only need your favorite wax for the affected area. If you are using polish, make sure to use the wax after your polish. If you use the wax first, the polish will simply undo all the work that the wax did.
The most cost-effective way to apply polish and wax is with a microfiber towel or sponge. However, if you have access to or the budget for a polishing wheel, you should use it! It will definitely be faster and easier, especially if you apply polish regularly.
[googleadsycc adunit=”inarticle”]
Time
In addition to the equipment listed above, you will need plenty of time to complete this project. Repairing a keyed car scratch on your own will take several hours. If you are determined to finish in one day, you will need to start very early. Or, you can wash and sand on one day, then return the next day to paint after the car is completely dry.
You will also need a lot of patience, especially during the sanding stage. There are a lot of repetitive motions, and it can be tedious to spend hours standing in the same direction. If possible, enlist a friend to help you with the job or at least to be a second set of eyes.
How to DIY a Keyed Car Repair: Step by Step
Your DIY repair can be broken down into four steps – preparation, sanding, painting, and cleanup. None of these steps require special skills; you are basically going to wash your car, sand the scratch down, and paint over it.
Park your car in a place with a lot of space. If you have your own driveway, that’s perfect, but if you live in an apartment, you may want to park away from other cars just to be safe. Assemble all of your equipment before you begin, and bring a speaker to play your favorite tunes!
Preparation
The very first step in the process is to thoroughly wash your car, paying special attention to the affected area. Getting rid of any dirt on the car will make sanding and painting easier. If you want to trim some time, you can focus on only washing the affected area; however, the overall effect will be better if you wash the entire car.
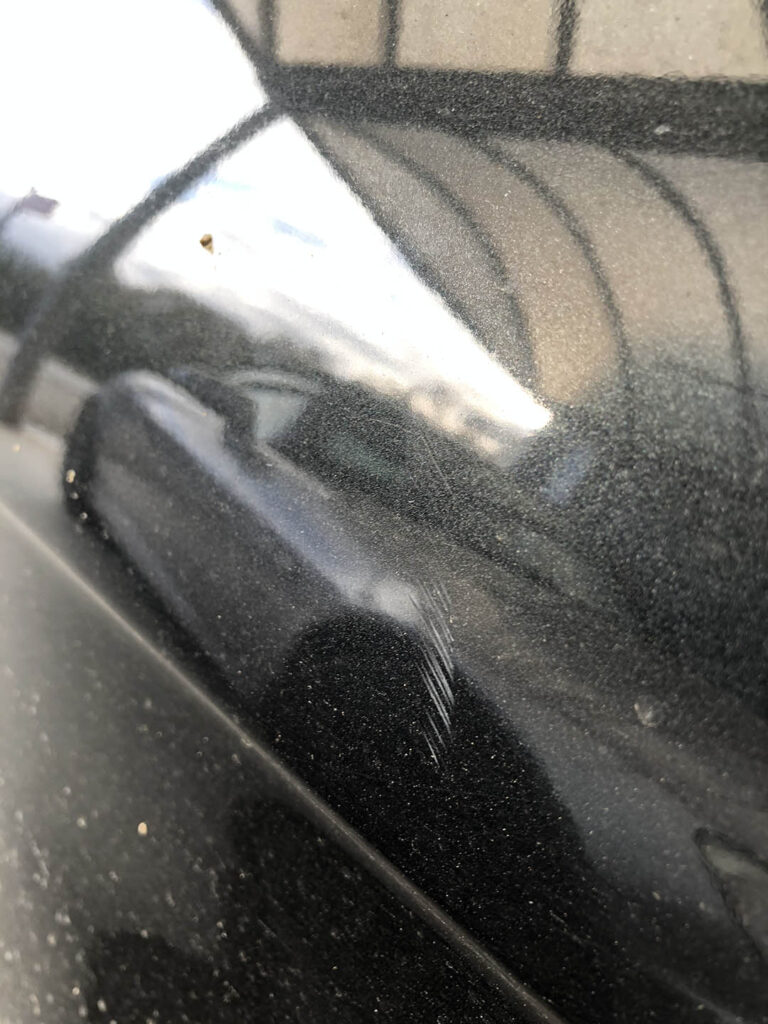
This also a good time to assess the extent of the damage. Spray the scratch with soapy water – if the scratch disappears, then reappears it is a shallow clear coat scratch. A shallow scratch is easily fixed at home.
If the scratch does not disappear, this means that it reaches down to the primer or metal of the car. You can still try to repair it on your own, but deep scratches are best handled by a professional.
Thoroughly dry the car with a microfiber cloth, focusing on the area where the scratch is located. You don’t want any moisture left behind because it will affect the application of the paint.
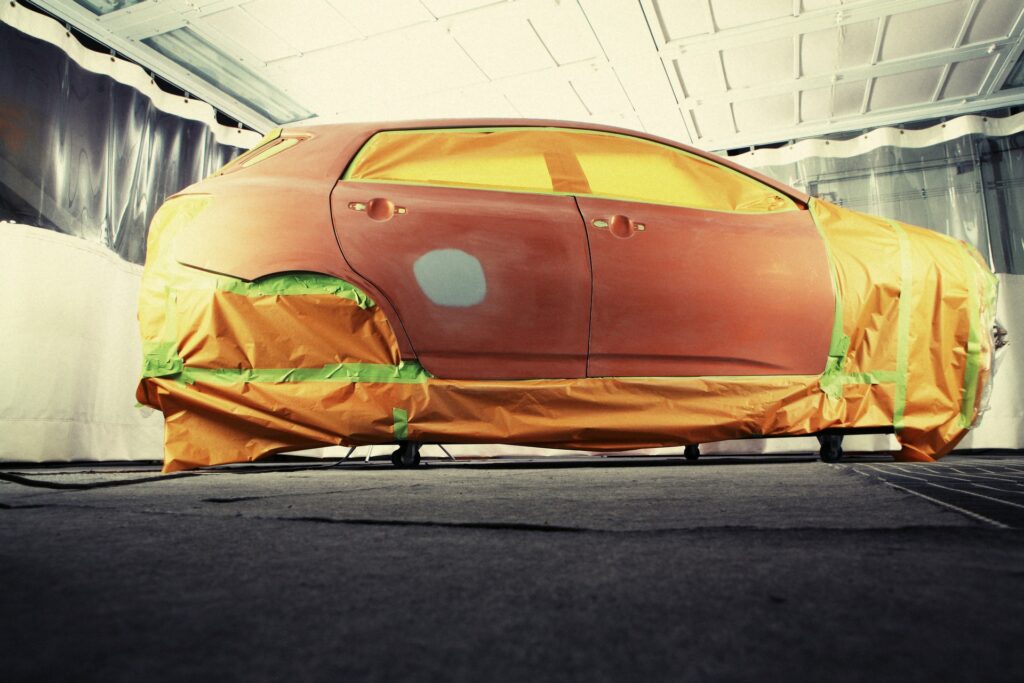
Use masking tape to outline the scratch to protect the original paint from being sanded and keep the rest of the area from being painted. Drape old newspapers on other areas of the car to protect from blowback from the paint.
Sanding
Now that your car is clean and dry, it’s time to begin sanding. This step is the most labor-intensive and may take several hours, so be patient and take breaks as needed.
It is recommended that you apply something of a different color than your car’s paint to help you ascertain how much to sand. Use spray paint in white or black, depending on the color of your car, and spray it on top of the scratched area. Once it’s gone, you’ll know you’ve sanded enough.
[googleadsycc adunit=”inarticle”]
Wrap your 2000-3000 grit sandpaper around the sanding block and dip it in a solution of soapy water. Holding the block at a 60-degree angle, move it from side to side over the scratch. Be careful to only apply gentle pressure.
Moisten the sanding block with every pass, either by dipping it in a bucket of soapy water or spraying the area if you’re using a spray bottle. The scratched area may seem cloudy after sanding, but don’t worry! This will be gone by the time you’re finished.
If your cut is only a clear coat, this may be enough to even out the scratch. If the cut is down to the primer, break out the 1500 grit sandpaper and wet sand perpendicular to the scratch. Once you’ve evened the scratch out, wipe the area with a microfiber cloth and then use the 3000 grit sandpaper to sand up and down, side to side, in overlapping strokes.
You can stop sanding once the scratch is evened out. If you have used the shoe polish trick, the absence of the polish is a good indicator. Use your best judgment, and get a second pair of eyes if you need it since this is the most critical step in the process. Once you’re happy with your sanding job, let the area dry completely before moving on to the next step.
Priming and Painting
Once the affected area is completely dry, it’s time to move on to priming and painting. Wipe the affected area with a dry cloth to make sure there is no sand or debris left from earlier steps. Use the primer and your brush to apply it in two thin coats covering the scratch. Let each coat dry completely before applying another.
Once the primer has dried, you can start painting. If you’re using a spray can, stand 6-8 inches away and spray the paint, sweeping the can in a side to side motion. Let each coat of paint dry before applying the next. Use the brush to even out any paint dribbles. Repeat until the level of the new paint matches the old paint.
Once your paint has dried, apply the clear coat in the same fashion. You will likely need only one coat of clear coat. Once you have applied it, remove the tape. If you have a heat gun or hairdryer, you may use it now to speed up the drying process. If not, simply let the affected area air dry.
Clean-Up
Once the clear coat is dry, you’ve done most of the work! Now it’s time to clean up the rest of the car to make the recently repaired area blend in with the rest of the car. It’s up to you the extent to which you want to polish and wax your car, but it is highly recommended.
Only use polish if you are polishing the entire car; this will even out all of the paint and get rid of any other small scratches or flaws in your paint. Once you have finished polishing, or if you have skipped this step, break out your favorite wax and give your car one final shine! Be sure to use small, circular motions for maximum effect.
Should I DIY My Keyed Car Repair?
Cosmetic fixes are a minor but disheartening occurrence, especially in the case of keying. Whether it was random or personal, the damage is often too extensive to ignore. You may be wondering if you should handle the repair yourself or take it to your local auto body shop. There are three elements to consider when determining whether or not to fix this yourself – cost, time, and the extent of the damage.
Cost

Cost is a major factor in deciding to tackle this project yourself. It can cost between $800-$1500 to have your keyed car repaired in the shop, depending on the depth of a scratch. In comparison, it will only take about $100-$150 to do it yourself if you have to buy all of the materials yourself.
If your car is new or expensive, it may be better just to take the car to a professional. If not, it’s worth trying to fix the scratches yourself.
[googleadsycc adunit=”inarticle”]
Time
By deciding to save money on your keyed car repair, you will have to sacrifice time. It will take about 8-10 hours from start to finish to complete this repair in optimal conditions.
Much of the time will be spent sanding and waiting for paint to dry, but it can be frustrating for an impatient person. Before you start, determine if you can handle devoting a whole day to completing this project.
Damage
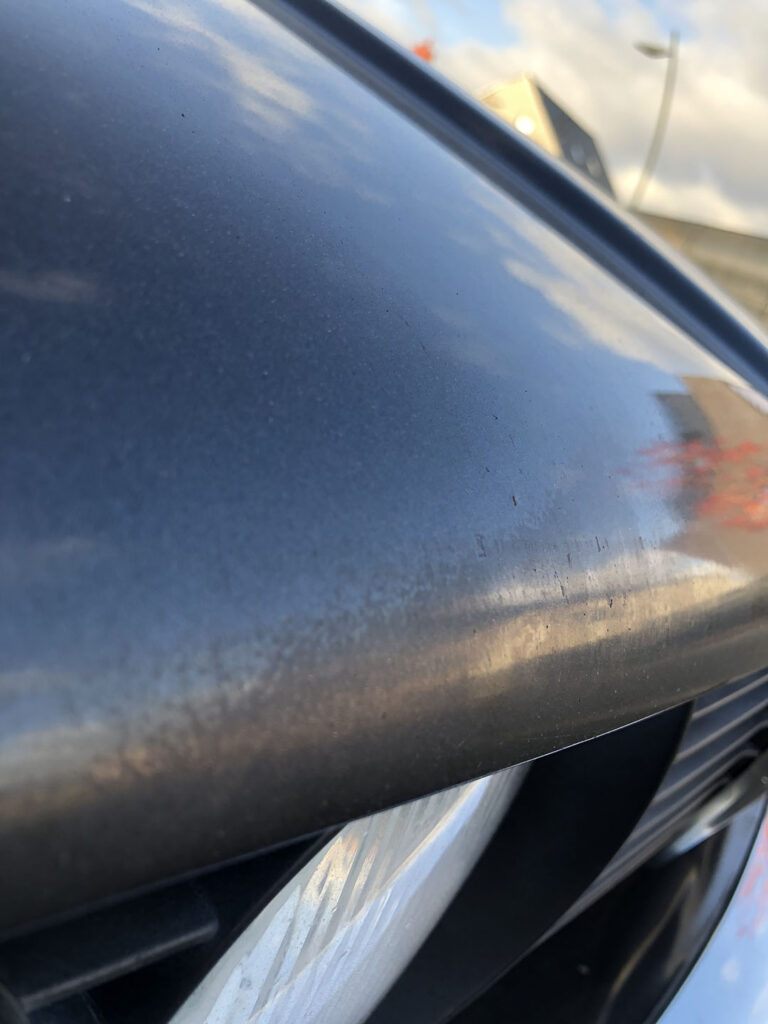
The depth of the scratch is the major factor in whether or not a keyed car can be repaired at home. There are four layers to a car door – clear coat, paint, primer, and the door’s metal. A shallow scratch may be easily buffed out and repainted if it’s only on the protective clear coat or paint.
If it’s through the paint and clear coat (reaching primer or metal), then you may need to repaint the whole door, or maybe the entire vehicle. If this is the case, it is best handled by a professional.
Final Thoughts
It is possible to DIY your keyed car repair. If you decide that it is a project that you can handle, all you need is time, patience, and some simple equipment to help your car look new again.

0 Comments