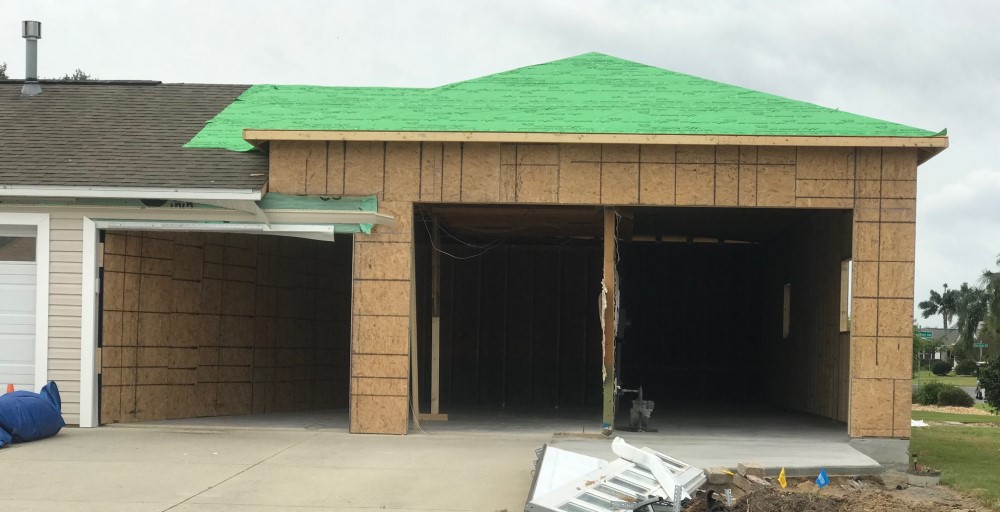
Many homeowners consider extending their
garage to create more space. An expanded
garage can provide additional room for vehicles, a workspace, or storage. However, some may worry that the project will
be too costly or complicated.
Can a garage be extended? A garage can be extended by hiring a contractor or doing the work yourself. The typical cost for extending a garage ranges from $2,000 (doing it yourself) to $20,000 (hiring a contractor.) The cost can vary based on the materials used, labor, and building permits.
Expanding a garage can be a good way to create
more space in your home. In preparing,
you should think about the purpose and design of the space. A budget should also be considered. The final
price for the project will vary due to factors such as who does the work and
how extensive the remodeling will be.
Knowing the options up-front can help homeowners come up with a plan
that works for them.
Is It Expensive to Expand a Garage?
The average cost of
remodeling a garage is $6,500.
The lowest range is about $2,000 when the project is done by the
homeowner, with no contractor involved.
The highest amount this type
of project might cost is $20,000
when hiring a contractor and doing an extensive remodel of the existing
garage.
The main expenses for this project are
materials, labor, and building permits.
The total cost of the project will vary based on these three factors.
Hiring a contractor, for example, will be much more expensive than doing the
job yourself. Creating a new space that
is livable will also require additional materials that could drive the price
up. A livable space requires:
Lighting
Running water
Heating/cooling
[googleadsycc adunit=”inarticle”]
Purpose and Budget for Garage Expansion
When starting a garage expansion project, it
is helpful to determine what the extra space will be used for. A working budget will also allow homeowners
to make decisions about whether to hire a contractor or do the work themselves.
Purpose
Extra space in a home can be used in a variety
of ways. Will an extended garage be used
for more parking or for a living space?
Taking time to consider the use of the space will be important from the
very beginning of the project. Some popular ways extra garage space can be used
include:
Additional
Parking – a homeowner may choose to expand a garage to
accommodate more vehicles such as;
Cars
Small boat
Motorcycle.
Living
Space – extra room in the garage can be used as an
apartment for a relative, or even rented out in order to make additional
income.
Storage – the existing storage in the home may not be enough. Instead of renting a storage unit, expanding the garage may be a better long-term option.
Workspace – sometimes the materials and noise from a hobby or craft can take
over the living space in a home. Extra
room in the garage can be used for even the noisiest of jobs.
Identifying the purpose of your project will allow you to accurately determine the costs involved. It can also help you decide whether or not it will be worth it. For example, if the cost of adding space to the garage for extra parking will cost more than buying a smaller car, the project may not be financially wise.
[googleadsycc adunit=”inarticle”]
Budget
Prior to beginning an extensive home
remodeling project, it is important to identify a budget. No one wants to have a half-finished garage
attached to their house. Be realistic
about how much can be spent and allow some wiggle room for unforeseen events
such as a pipe breaking or permit fees.
Taking time to consider the budget will also ensure a plan is realistic.
Different projects may require larger
budgets. Preparing to build a new
second-story living space in the attic of the garage will require much more
money than extending a side wall a few feet for extra storage. It may be useful to use a budgeting spreadsheet during this step in
order to keep track of your plans.
Some homeowners may have a lot of experience
with renovations and construction. Doing
the garage expansion project yourself will save thousands of dollars. However, remodeling a home is time-consuming
and requires a good understanding of building rules and regulations. Before picking up a sledgehammer and knocking
down walls, it is important to ask some key questions:
Do I know what the
laws are concerning building permits and regulations for my area? Most cities make their codes
easily accessible online, but this will require some time to read through. Multiple forms may need to be filled out, and
visits to city offices may be necessary.
Making a mistake in the process could slow down or stop the project in
its tracks.
Am I familiar with how to design and build a project of this scale? Think about what projects you have done in the past, and whether they are on the same level. Do you have experience with electrical systems and pouring concrete? Have you ever drawn plans for a room? Of course, there are many ideas for do-it-yourself garage projects online. Perhaps taking a look at these will help you gauge your ability to pull it off.
[googleadsycc adunit=”inarticle”]
Do I have the
equipment and materials to complete the job? Some equipment needed includes:
Large truck for hauling bags of cement
Circular saw for cutting beams
Angle grinder for scoring concrete
Although garages
are often jam-packed with various tools, few people tend to have the
specialized equipment needed for such a job.
Consider whether you would need to purchase lots of new equipment – and
if you will ever use it again.
Can I find – and
work with – all the support staff I may need during this project? At
times you may need to call upon an electrician, an extra carpenter, or a window
installation crew. Do you have existing
contacts, or will you need to research and interview candidates? All of this takes time, plus you will need to
communicate daily to keep the job running smoothly. If you don’t enjoy managing other people,
this might cause extra stress.
If your answer to the questions above was no,
it may be more realistic to hire a contractor. A contractor will probably cost more, perhaps
MUCH more, but will take care of every aspect of the job. After going through the list above, it isn’t
hard to see why they are paid so well.
Consider your experience with this type of work before choosing to do it
yourself.
When Expanding Is Not An Option
For many, expanding the garage may not be
realistic. There are other options for
dealing with clutter and a lack of space, many of which require little to no
money. Homeowners may find these ideas
more appealing, and practical, than remodeling.
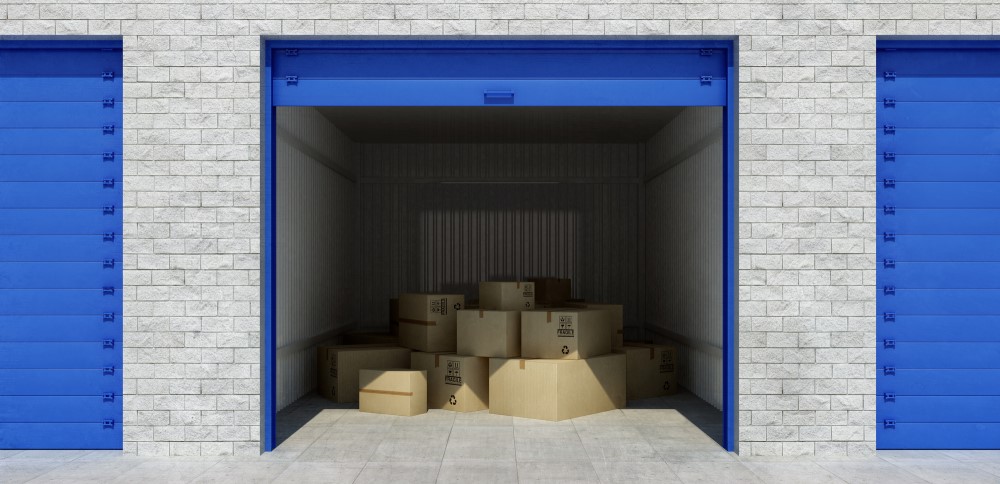
Rent a storage unit
The monthly costs for off-property storage can
be minimal – a small unit tends to rent for $50 or so per month. This is certainly less than a garage
remodel. Plus, if items are kept in
storage for months on end, the owner may decide they don’t need them after all;
and let them go for good.
Let it go and declutter
Let it go and create more space in your
garage, for free! Put on a pair of
gloves, grab a trash bag, and move items out for good. Usable furniture, toys, and electronics can
be donated to a good cause or sold on sites such as OfferUp or eBay.
Downsize your vehicle collection
If you are running out of room to store cars,
motorcycles, or bicycles, it may be time to sell or donate your extra vehicles.
It’s a good problem to have! Donate to a local charity or sell an old car
to a college student.
Transform the guest room into a workroom
The garage may not be a viable option for a
workspace, so consider whether a guest room can double as a hobby nook. If no
extra space can be made in the home, it might be worthwhile to purchase a
stand-alone shed. This would be the perfect place for a craft area or
woodshop.
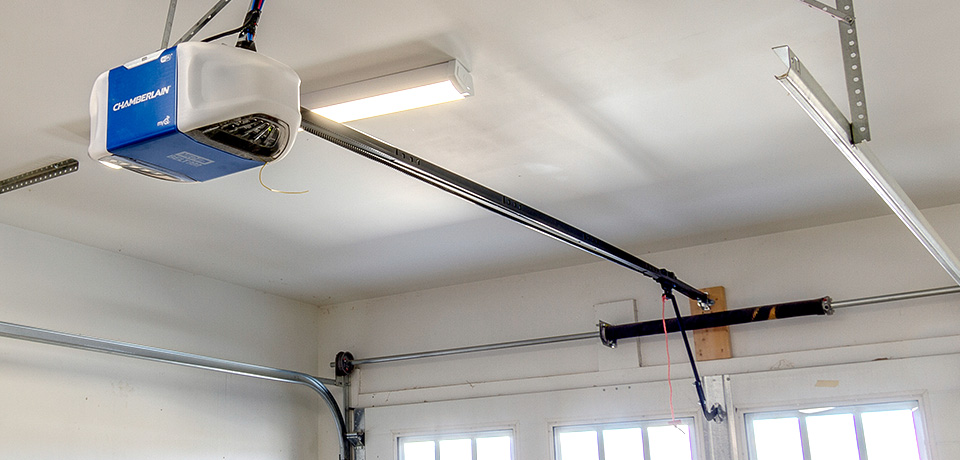
If you spend much time in your garage, you
probably want the ability to open and close the garage door easily. Some garage
door openers don’t seem to work as well as others, and you might be wondering
why that is. If you’re concerned about how well your garage door opens, you
might be considering getting a stronger motor for the system.
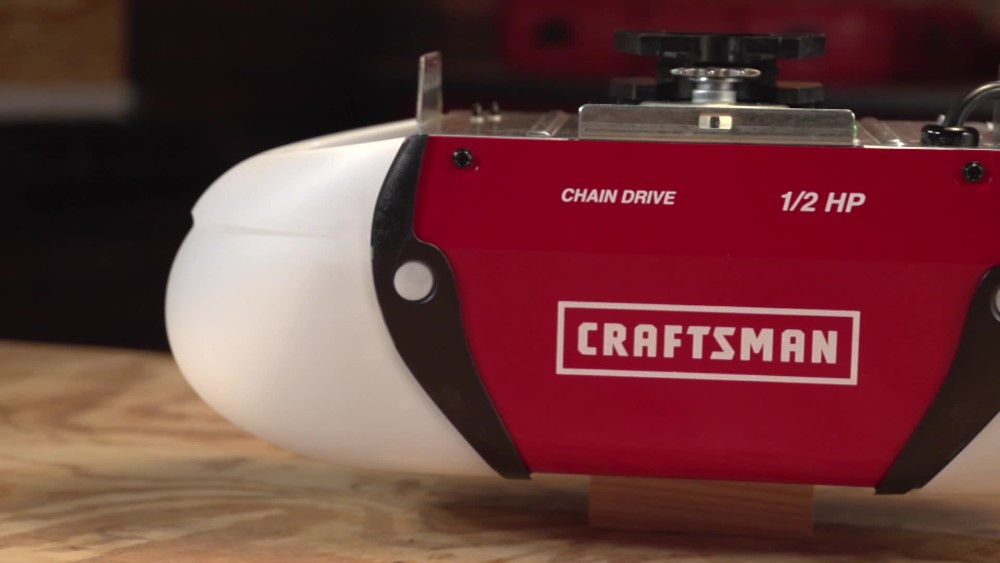
Can a garage door opener be too powerful? The horsepower of a garage door opener does
little if anything to affect the power of the opener. While openers do come
with different amounts of horsepower, the labels are primarily a gimmick. An
opener with more horsepower may open and close the door faster, but the
difference is barely noticeable.
When you need or want a new garage door
opener, it’s important to consider some options. Of course, extra horsepower
might sound good, but you don’t want to break your garage door either. Luckily,
most openers aren’t too powerful for the standard garage door.
How Strong Should Your Garage Door Opener Be?
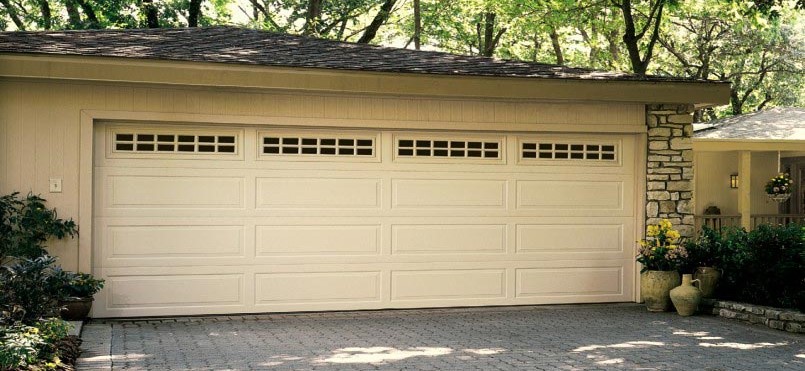
Before you can determine if a garage door opener is too powerful, you should consider how strong your opener needs to be. That way, you will know how much power it takes to open and close the garage door. After all, garage doors come in different sizes, and they require different types of openers.
A garage door that opens and fits one car through it works well with a 1/2 horsepower motor.
If you want something where the motor won’t wear down quickly, you can choose a garage door opener with more horsepower.
Larger garage doors will already require a more powerful motor, regardless of if you want the extra power or not.
You can look at 3/4 horsepower motors for larger garage doors, or you can go up to motors with 1 1/2 horsepower.
Also, consider the height of your garage door. If your door is shorter or taller than average, that can affect how much power the opener needs to open and close the door safely.
[googleadsycc adunit=”inarticle”]
When you’re trying to determine if your garage
door opener is too powerful, consider how big the door is, both across and up
and down. While a single section garage door is typically smaller, its height
could necessitate a garage door with more power. The opposite is also true
where a larger door that’s not as tall shouldn’t require as much power to
operate.
Can the Opener Be Too Strong?
Unless you have a smaller garage door that’s
also on the shorter side, you probably won’t find an opener that’s too
powerful. Some people claim that the different horsepower ratings are primarily
for show and that they don’t matter. The allure of more horsepower would be enough
for some people to splurge a little more on an opener.
If you’re looking at an opener that has more
horsepower and one with less, you should consider
other factors, like the cost, before the horsepower. At most, the motor
with more horsepower might work a little bit faster than the other. While a
faster motor might not wear down as fast, there aren’t many other benefits to
it.
However, a potential issue with a powerful
opener is if you set the force too high.
That could cause the door to get caught on something, and that might damage the
door and the opener. Luckily, you can easily avoid this by making sure the
force is just right for your garage door.
Most garage openers have similar ways to set the force. If you want to see a demonstration of one commonly used opener, check out this video:
When it comes to choosing the right garage door opener, you might be tempted to consider power as the main factor. However, plenty of other things can make a less powerful motor more attractive and vice versa. Consider the power along with other factors before deciding if a garage door opener is right for you or not.
Of course, the size of your garage door will determine whether an opener is too powerful or not powerful enough.
You should also consider what materials your garage door is made of since that can affect the weight. Heavier garage doors need more powerful motors.
The drive type for the door is also important. Common options include a belt, a screw, or a chain. This can also help you determine what sort of power you need for your opener.
Other factors, like the cost of the opener and potentially professional installation, are also worth looking at.
[googleadsycc adunit=”inarticle”]
Power can play an important role in choosing
your garage door opener, but it’s not the only thing. You should also think
about the type of mechanism involved as well as the materials. All those
factors can help you decide on the right garage door opener.
Should You Replace a Strong Opener?
All of this may make you think about switching
out your opener, even if you never thought about it before. In most cases, you
probably don’t have to replace your current opener unless it’s not working
correctly or it’s missing safety features. If your current opener suits your
needs, there’s no reason to change it unless you want to.
Perhaps you have an opener with a lot of
horsepower, and you realize that it may be more than necessary. That doesn’t mean you should switch to
something with less horsepower. After all, the higher horsepower can be
nice when you need to open and close the door.
High horsepower can also help extend the life of the opener, which can save you money in the long run. However, that also doesn’t mean that you need an opener with too much horsepower. Instead, focus on the size and materials of your garage door as well as the opener’s safety and ease of use.
If your opener doesn’t have features like an automatic reversal, you should upgrade to an opener. That way, the garage door will know not to go down if something or someone is blocking the way. And if you already know how to use your garage door opener, you don’t have to worry about switching to something you’re not comfortable with.
[googleadsycc adunit=”inarticle”]
How Do You Choose the Right Garage Door Opener?
Choosing the perfect garage door opener isn’t
easy, and you may never find the best one for you. However, make sure you think
about what you need and want out of the opener. You should also think about
things like the overall cost, how you plan to install it, and how often you’ll
use it.
First, think about if you even need a new opener. If your
current opener works fine, you don’t need to spend the time and money on a new
one.
You should also consider the cost of the opener and any
installation fees. While that shouldn’t keep you from getting a new opener,
it’s worth looking into so that you know how much you can expect to spend on
it.
If you don’t plan on using the opener that often, you may not need one with a ton of horsepower. On the other hand,
frequently opening and closing it might necessitate something stronger.
Finally, think about how quiet you want the opener to be.
Some openers, regardless of horsepower, are much louder, and that could be a
dealbreaker for you.
These factors will help you make the best
decision on a garage door opener. While power is worth considering, it’s part
of the bigger picture. The more you can learn about garage doors and openers,
the easier it will be to make the right choice.
Final Thoughts
The good news is that the differences in power
aren’t that big. While some garage doors need more power, it’s not a bad thing
to have more power than your garage door needs. If the door opener opens the
door too quickly, the culprit is not the horsepower in your opener, but your
force setting.
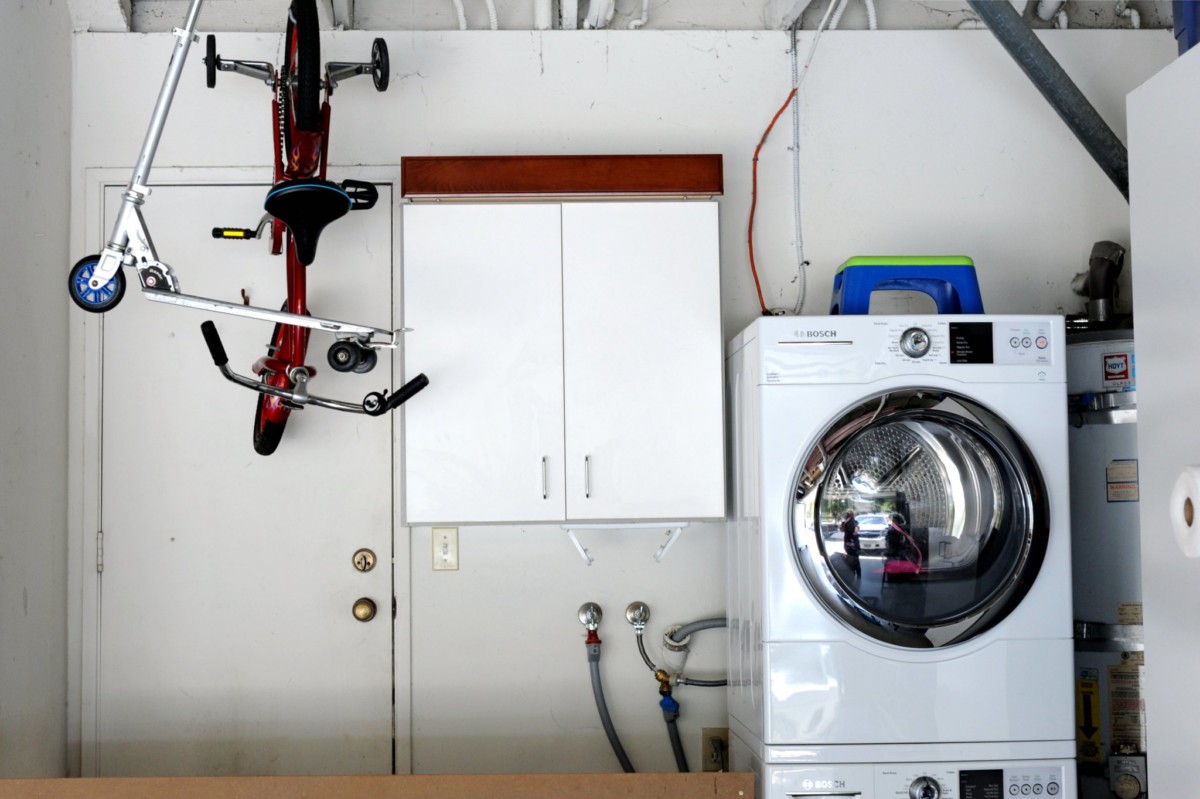
Whether space is tight in your home or you’re creating a laundry room in your garage cave, there are a plethora of reasons why you may want to move your tumble dryer into your garage. Before you make the move, there are a few factors to keep in mind for functionality and efficiency that we will cover in this article.
Are tumble dryers ok in a garage? Condenser and heat pump tumble dryers cannot function properly in temperatures below 10°C/50°F, making them a poor choice for a garage that is not climate controlled. Vented tumble dryers are ok in garages as long as there is outdoor ventilation available.
To ensure you’re equipped to move your current dryer into your garage or prepared to buy the optimal dryer for your space, there are some important aspects to consider. Moving your dryer into your garage without being properly prepared could result in damage, undried clothes, or mold riddling your space.
Important Considerations in Choosing Your Dryer Type
To figure out the best tumble dryer for your garage, or if your current unit is equipped to be moved to your garage, there are a few foundational questions you need to ask yourself. The most important considerations that impact your dryers’ functions and efficiency that we will cover include:
Dryer type
Climate inside and outside your garage
Insulation and temperature controls
Location of your dryer
Ventilation
Dryer brand recommendation included
However, before jumping into this information, it is important to start by identifying the kind of dryer you already own and the kind of dryer you will need if you are to set up an operational tumble dryer in your garage.
What is the Main Difference Between Dryer Types?
Before you can identify which dryer is right for you, it is essential to learn the differences between the three different kinds of dryers, the condensed, heat pump, and vented dryer.
Very energy efficient—uses heat pump instead of electricity; will take slightly longer to dry
Energy efficient
Maintenance
Need to empty water reservoir (will freeze in cold conditions)
Need to empty water reservoir (will freeze in cold conditions)
No daily maintenance required
[googleadsycc adunit=”inarticle”]
The Climate of Your Garage
The climate not only inside your garage but outside your garage is critical for the functionality of your tumble dryer. Here are a few things to consider when it comes to garage temperature:
It is important to look at how cold your garage gets, and if you have a way of temperature controlling your space. In a standard garage used primarily for car parking, it is challenging to regulate the temperature. For a garage that has been converted into more of a garage cave, you may have less of an issue with the cold temperatures coming into your unit.
Do you live in a climate where the outdoor temperature does not drop below 10°C/50°F? If so, you probably do not need to think about when looking at moving any dryer type to your garage. This may also help you avoid buying a new unit.
If you have a garage cave, this may be the perfect spot for your dryer as you are likely climate controlling the space similar to how you would in your home.
For those with garage caves, it is common to build a separate room within the garage to keep your washer and dryer. This creates a more classic laundry room that will not take space in your home.
Vented Dryers
Now that we have identified the optimal dryer type for a garage space, let’s cover a few more important points about the vented dryer.
Since vented dryers do require a hose, it is important to ask yourself if you have an appropriate location where the ventilation system can access the outdoors. If you do not, this may be a concern! Without ventilation, your garage will get damp, which could cause mold or rusting of other items in your garage.
If you do not already have outdoor access, do you have the ability to create ventilation? To put a hole in your garage for your venting system will require a professional which will cost you money. Alternatively, if you have experience with this kind of installation, you could create a hole in your wall for the vent hose yourself. This is not recommended for those who do not have building experience as you could make your garage structurally unsound and create safety concerns.
Some people choose to hang their vent hoses out of their garage windows; however, for those who have a garage cave, this may not fit your aesthetic or be impractical. This may be a good temporary fix but is not a long-term solution for ventilation.
[googleadsycc adunit=”inarticle”]
Reasons to Avoid Putting a Tumble Dryer in Your Garage
Although tumble dryers are ok to put in your garage, there are a few factors that may limit your ability to make this move, including:
If you only have a condensed or heat pump dryer, you may want to keep it inside your house for optimal functionality.
If you’re moving a vented dryer and do not have or do not want to create outdoor access to ensure proper ventilation.
If you do not have the resources necessary to create a hole for your vent hose.
If your garage is not insulated or climate controlled, it may get too cold for your condenser or heat pump dryer.
If you live in a very cold climate, your garage may get too cold even if you insulate part of it. In this case, you would need a way to control your garage temperature if you are set on moving your tumble dryer.
Check your warranty! Many dryers are not covered by their warranty if users place them in their garage as low temperatures can cause malfunction. If your current dryer is not covered by part warranty, if you switch its location to your garage, consider keeping it in your home.
If you do not have a dehumidifier or a way to control the humidity while drying larger items such as bedding, you may experience mold in your garage. Drying larger items causes an increase in water vapor leaving your machine, which may require additional ventilation.
[googleadsycc adunit=”inarticle”]
Recommended Dryers for Your Garage
For many readers, you may be hoping to move your current dryer to your garage, despite the dryer type you already own. This may not be the best decision, as your efficiency may decrease with the colder temperature of your garage. If you do not already own a vented tumble dryer, we would recommend looking into buying a new machine.
Based on consumer feedback from those with dryers in their garages, the Splendide 120V Dryer is said to be effective and equally efficient in a slightly lower temperature. The warranty on this unit does not specify a lack of coverage for those placing the unit in their garages—therefore, your warranty will not be invalidated by moving this dryer into your garage. This dryer is specifically designed to be energy efficient and dry your clothing quickly while producing enough heat to keep itself warm in a colder environment.
When looking at new units to potentially purchase for your garage, read through your warranty for any caveats based on where your dryer is set up. If a warranty specifies invalidation for garage units, this will not be the right unit to fit your needs!
For many guys, a garage isn’t just a workshop.
It’s a sanctuary and a man cave, where you get to just enjoy doing your own
thing. Most garage activities require at least some electricity, which is why having
a functional garage circuit breaker remains so important.
What do you do if your garage breaker keeps
tripping? Troubleshooting your breaker and fixing the source of the problem
is what you need to do. Most breaker-related problems stem from:
Overconsumption Of Energy
Garage Doors
Bad Outlets
Circuit Breaker Problems
Fixing a circuit breaker that’s on the fritz
sounds intimidating, but it’s usually not that bad a situation. Here’s what
every homeowner should do.
What Do You Do If Your Garage Breaker Keeps Tripping?
The best way to handle a garage breaker that’s
on the fritz is to look at the usual suspects, and figure out what fix you’re
going to need. To do this, you’re going to have to focus your troubleshooting
in a specific order:
Power Usage
Garage Door
Power Outlets
The Circuit Breaker Itself
[googleadsycc adunit=”inarticle”]
Here’s how to troubleshoot and fix each issue.
Checking Your Power Consumption
The easiest thing to troubleshoot is your power consumption. If this issue is relatively new, take a look at your current power usage in your garage. Did you get any new tools? New lights, maybe? If you keep using them and leave them plugged in, the extra power use could be cause for a tripped circuit breaker.
To troubleshoot (and fix) this issue, just
unplug the new items and see if it makes a difference. If your circuit breaker
stops tripping, you just were using too much energy for the circuit board to handle.
Inspecting Your Garage Door
Believe it or not, garage doors are one of the
most common reasons why a garage breaker could start tripping on a regular
basis. Garage door openers take a lot of power and require a lot of work to
use.
As garage door openers age, parts that keep them
moving start to fail. Many of those failures can cause a circuit breaker to
fail. Here’s what to look for in your garage door openers:
[googleadsycc adunit=”inarticle”]
First, take a look at the wiring. Does your garage door opener have rusty, frayed wiring? This is the most likely cause of your breaker trips. You can either replace the wiring or get a new garage door opener.
Then look at the plugs. If your garage door’s outlets look worse for the wear, it probably has an outlet problem. Call your electrician to see how it can be fixed.
Then watch your garage door in action for warning signs. Garage door motors that are straining to do their job can trip a breaker, too. If you notice grinding noises, rust, or uneven opening, this is your culprit.
Unplug the garage door and open up the logic board. When a logic board loses its functionality, parts of the board can literally burn out. This causes breakers to trip. If you notice burn marks on your logic board, you will need to replace your garage door opener.
Checking Your Power Outlets
The reason why we have circuit breakers is to prevent electrical fires from short-circuited electronics. By cutting the circuit’s access to power, breakers reduce the chances of fire caused by electrical heat. Simple, right?
Sometimes, things can still short-circuit. When
they do, you might hear a zap, pop, or even see smoke. Shorts can still be
intense, even if breakers prevent them from getting out of hand. It’s not
unusual for power outlets and other wiring to get damaged as a result of the
heat.
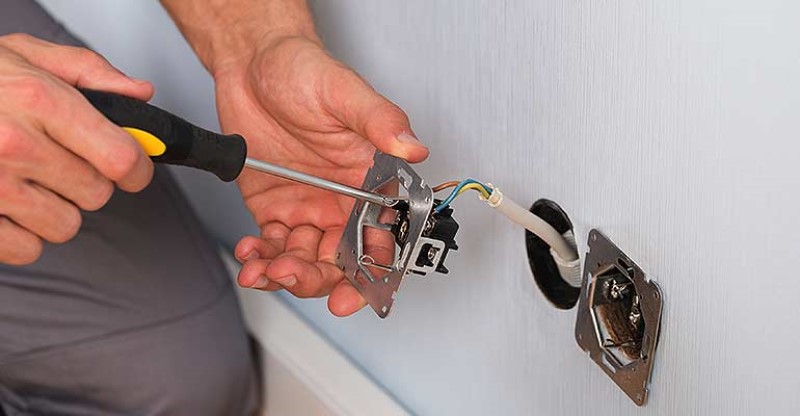
Power outlets can also sustain damage from other
things, too–including wear and tear. Troubleshooting a bad outlet is fairly
easy. All you need to do is look for the signs and fix the outlet.
[googleadsycc adunit=”inarticle”]
Signs Of A Shorted Outlet
Outlets that are damaged by short-circuiting electronics will trigger a breaker to trip even when no risk of a short is happening. If you have a damaged outlet, then you need to get it fixed in order to stop your garage breaker from tripping.
Shorted outlets can display a variety of signs,
including:
Smoke Stains. Does one of your garage outlets have smoke-like stains
surrounding it? If so, it’s a shorted outlet and needs replacement.
Crackling Noises. Some heavily damaged outlets will make a crackling noise
regardless of what’s plugged in.
Burn Marks On Outlet Covers. Yikes! This is a sign of an electrical fire. That
outlet needs to be replaced immediately!
Water Damage Nearby. Flooding can also cause an outlet to short-circuit. If
too much water got near your outlet, it could have led to permanent
damage.
Signs Of A Worn Out Outlet
Outlets don’t need to be shorted to go bad.
Sometimes, it’s not a matter of shorting a circuit but just a matter of heavy
use. If any of these signs ring true, you need to replace your outlets:
[googleadsycc adunit=”inarticle”]
Worn Wires. Worn, rusty, or frayed wires are a sign that you need
to upgrade your outlets. It’s a fire hazard and a breaker tripper.
Loose Plates. Nasty stuff can get into outlets if you have a loose
plate or a nearby hole in your wall.
Rust. Rusty outlets are not good outlets, especially if the
rust is inside the outlet.
Checking Your Circuit Breaker
Much like with other aspects of your garage,
your circuit breaker will need to be inspected. Breakers can trip themselves if
they are too worn or if they’ve been damaged. If you notice loose wires, burn
marks or other signs of wear, your circuit breaker may be to blame.
A circuit breaker gone awry is no laughing matter and should be addressed immediately. After all, breakers are meant to protect your home against electrical fires. When your breaker stops functioning properly, you are potentially putting yourself at risk of a fire sparked by a short-circuit.
With most garage breaker problems, you can solve
the problem on your own using a DIY tutorial and a little common sense.
However, there are moments where it’s smarter and safer to call in a
professional. These signs suggest it’s better to get an electrician to help you
out:
You can’t find the cause of the
tripping. If you went through
troubleshooting without any luck, the source of the problem could be
something more worrisome. Calling in a professional is a safe way to make
sure you find the real cause and get it fixed.
The problem in question deals
with your circuit breaker. Depending on
the issue, you might need to replace your breaker. This isn’t a project
for a casual DIY home enthusiast and should only be done by a qualified
pro.
You need a new garage door. Removing your old door and installing a new one is a
hassle. Most people prefer the convenience of having a professional do it,
even if it’s an “easy install” kit.
There is water damage near your
outlets or breaker. Water damage can do a lot more
than just trip a breaker. It can cause your electronics to rot and wreck
your garage walls. It’s smart to have professionals inspect it, just in
case.
You discovered serious
electrical damage throughout your garage. Sometimes,
homeowners discover that it isn’t one problem causing the trips, but a
series of issues instead. It may be too much work for one person to
handle. Asking for a little help won’t hurt.
We have a love-hate relationship with our garages. While they can store some of our most prized possessions, they can also attract grease and oil stains, house dangerous chemicals, and provide a home to all kinds of insects and rodents. As a result, every once in a while, the garage walls need a good old-fashioned cleaning.
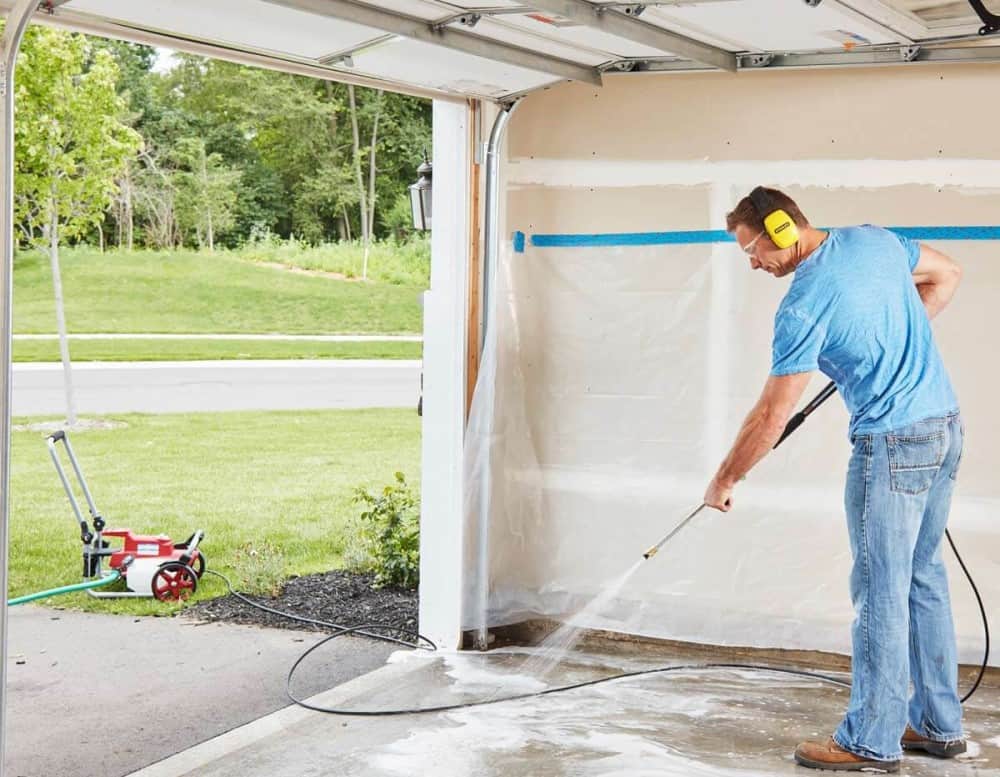
Can you pressure wash garage walls? No! As a general rule, even non-commercial grade
pressure washers are too powerful for interior garage walls. The most effective and safest method to clean
your garage walls is with a large bucket filled with warm water, detergent, a
heavy-duty sponge and scrub brush—preferably one with a long handle to get at
those tough-to-reach corners.
Every homeowner wants to save time (and a lot of effort) by using the most powerful tools they have handy to get nasty jobs, like cleaning garage walls, done quickly. You are not the first, and you won’t be the last to think this way. However, taking the time to consider all the options can prevent wasted hours and unnecessary repair costs.
Why Can’t You Use a Pressure Washer on Garage Walls?
The primary reason to avoid using pressure
washers is that most interior garage walls are made of drywall, which will be
easily damaged by the water seeping in, especially when under high pressure.
[googleadsycc adunit=”inarticle”]
On rare occasions, your interior garage
walls may be too dirty to clean by hand, have too much square footage, or
access may be otherwise blocked and only reachable using a power washer
extension. If this is the case, you may wish to hire a professional company to
handle the job. They will have the
proper equipment to adapt to any wall surface without damaging them.
That being said, many DIY types will want to save time by resorting to using a pressure washer.
If you still insist on doing the job
yourself AND using a pressure washer, here’s one approach you can try.
Apply a degreaser at low pressure—about 100 psi or less, keeping in mind that most pressure washers easily reach 2500 psi.
You should then brush down the walls manually.
Finally, you can rinse the wall with low volume water (1-2 gallons per minute) and at a maximum of 500-1000 psi on your pressure washer.
Here’s
a handy checklist to get the job done efficiently:
Don’t try to work around garage
clutter. Pull everything possible out of
the garage. Not only will you get a
better result, but it’s also a lot safer as well. It also provides the ideal opportunity for a
“garage junk purge”!
Depending upon the age of
your garage, you may need to allow more time for this step that you originally
planned. Older garages have infinitely
more nooks and crannies than today’s newer, space-efficient designs.
Once the garage is empty, using
a broom, shop vac, or a vacuum cleaner with a longer hose and bristle
attachment, get into the corners and remove cobwebs, spider webs and all loose
debris (old plaster, nuts & bolts, and those newspapers from the 1970’s).
Your stepping stool or
six-foot ladder will come in handy here.
Fill a large bucket with warm
water and detergent and scrub the walls.
Again, keep a stable stepping stool or ladder handy for the higher spots,
especially if you have eaves or lots of overhead storage space. NEVER overreach for these areas!
[googleadsycc adunit=”inarticle”]
TIP: To avoid dark stains running down the wall,
start from the bottom of the wall and work up, but always start with the walls
and then get to the floor last.
Use ammonia on stains the
detergent can’t remove. This should
handle the vast majority of stains you’ll encounter in the average garage.
Occasionally, you may have
to resort to a degreasing cleaner or some other more powerful cleaning
agent. This will depend upon the nature
of the stain. (See some detergent recommendations below)
NOTE: Mix one or two cups of ammonia per gallon of
water. When using ammonia ALWAYS, make sure you have ample air flow inside the
garage and wear a mask and safety glasses.
Don’t overdo it on the water. Be sure to avoid pooling the water on
shelving, benchtops, and other flat surfaces like windowsills. These left-over puddles can seep into wood
and drywall, causing damage over time.
You’ll want to make sure the detergent and
water mixture dries as quickly as possible, especially if you live in a humid
region of the country.
Therefore, good ventilation and a couple of
household fans should do the trick.
[googleadsycc adunit=”inarticle”]
How About The Other Surfaces?
The majority of the above rules do not
apply to either the floor or the exterior garage walls. One “wall” where a
pressure washer will come in handy is the garage door!
Most garage doors are made of a thin metal
barrier with some type of filling material…or they’re made of wood. Either way, you should be safe using a
standard pressure washer. If the paint
on the interior surface of the door is older and peeling, you will likely need
to repaint once you’re finished.
A word of caution about electronics on any
garage walls and another reason NOT to use a pressure washer: Many a garage door opener internal pad has
been quickly destroyed by a single pass with a pressure washer. Replacing this mechanism will likely be more
inconvenient than the entire cleaning job!
Most garage floors are made of
concrete. You would then apply the same
degreasing stain remover you used on the walls to any stubborn stains. Let the
degreaser sit for 20 minutes and scrub the chemical into the stain to be
certain you get proper penetration.
[googleadsycc adunit=”inarticle”]
TIP: When it’s time to crank up the pressure washer, always test on an out-of-view area of the surface you’ll be cleaning to be certain it won’t cause any damage to the surface of the floor.
Also, if your garage walls are made of
drywall, you should cover them thoroughly.
Even then, water will likely find a way in. Beware!
Unless you have a drain inside your garage,
it’s usually more practical to start at the back of the garage and drive the
water and dirt toward the front. Once you’ve finished the job, be sure to take
a regular hose and wash away any chemicals or dirt that remains on your
driveway surface.
Exterior walls are generally safe when
cleaning with a pressure washer. Although when doing so, it is more practical
to start from the top and work down and “cut around” any wooden frames and
doors. If the wood is older, a pressure
washer can easily cause damage.
How Do You Cut Through Tough Grease Stains?
Between car supplies, lawn mowers, and
other oil-covered tools and supplies, garage walls and floors can be covered
with years of grime. What’s the best way to get surfaces clean again…especially
if they’re covered with grease?
If you’re in the market for a degreaser,
here’s what the “grease gurus” at Carbibles.com recommend as their top three:
In many household situations, using a
pressure washer can be a huge time and effort saver. However, using one in this situation can end
up causing more harm than good.
Save yourself some expensive repairs (and
embarrassing explanations) and stick to the “old-school” warm water and
detergent option.
In the end, going low-tech provides a great
way for the kids to earn some allowance!