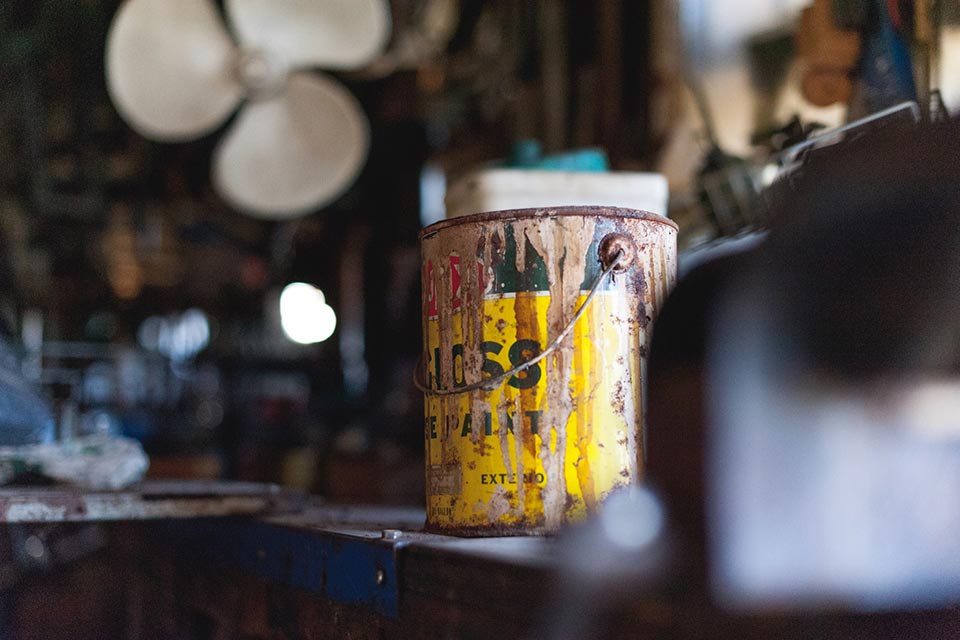
Your garage door can be an asset to your home’s look or a major hindrance. A cracking paint job or unsightly color is going to make your house look dingy and unwelcoming, no matter how nice you’ve made the interior of your garage. Thankfully, painting a garage door is a simple DIY job, as long as you pick the right paint.
The best kind of paint to use on a garage door is an exterior latex paint from a paint brand that makes quality paint. This is true for vinyl garage doors and wooden garage doors. For metal garage doors, the best paint is oil-based exterior paint, but exterior latex paint will still work.
There is a little more that goes into picking the perfect paint for your garage door than this, however. The type of paint that is already on the door matters. And what about primer? What about painting the inside? We’ve got everything you need to know about picking the best paint for the inside and outside of your garage door.
How to Pick the Best Type of Paint for a Garage Door
For the most part, you can’t go wrong by using an exterior latex paint of good quality, as long as the garage door is properly prepared for the painting process. All door types do well with exterior latex paint, but metal doors tend to hold up better with an oil-based paint.
But what is the difference between these types of paint, and why does it matter? Before we get started on picking paint for your door, we’re going to briefly go over the differences between the different types of paint.
What is the Difference Between Exterior and Interior Paint?
The one type of paint you definitely don’t want to be using on your garage door (on the outside at least), is interior paint. Although interior and exterior paint may include the same types of ingredients like pigment and solvent, these ingredients are formulated to withstand outdoor conditions.
If you use interior paint on your garage door, it will fade faster and may crack or peel even though it will look about the same directly after drying. So definitely go with exterior paint!
What is the Difference Between Latex Paint and Oil-Based Paint?
The paint at a home improvement store can be broken into two general categories: latex and oil-based. Latex paint isn’t necessarily latex, but it is the name given to most water-based paints. The terms are used interchangeably, even though it is somewhat inaccurate.
The main difference between latex and oil-based paint is the type of liquid used to make them the right consistency.
Oil-based paints use a synthetic oil called alkyd or a natural oil like linseed oil. Water-based paints use water. This may not sound like a huge difference, but it is! Water-based are becoming increasingly popular because they:
Don’t create as much odor
Create fewer harmful fumes
Have more elasticity, which means it doesn’t crack with changes in temperature
For indoor painting, you won’t need as much ventilation, and for outdoor painting, the paint will crack less. In most cases, latex paint is the way to go.
[googleadsycc adunit=”inarticle”]
What is the Garage Door Made Out of?
Photo by Brandi Ibrao on Unsplash
The first thing you’ll need to do is figure out what your garage door is made out of. Garage doors are usually made out of one or two of these materials:
Vinyl/Composite/Fiberglass: The best paint for composite and vinyl materials is exterior latex. Oil-based paint will not adhere as well and may crack over time.
Wood: Wood requires exterior latex paint. Oil-based paint will crack and peel over time. If painting bare wood, you will need to use a stain-blocking primer if you plan to paint your garage door a light color. If painting stained wood, TSP will be required to prep the door for primer and paint.
Metal (steel and aluminum): Oil-based paint works better at protecting metal against rust than latex paint (which is water-based).
Glass: Painting glass is not advisable as paint does not readily adhere to glass. You can use window films to garage windows. Glass garage doors usually have metal framing, which can be painted as long as you’re ready for the job of taping off the glass.
The easiest and most accurate way to figure out what your garage door is made out of is to use the identifying information on one of the stickers on the door. There may be one on an inside panel or along the edge of the panel that runs through the rails.
What Kind of Paint is Already on the Door?
Up until now, things have been pretty straightforward. Exterior latex paint unless the door is metal. However, the type of paint your painting over matters! Here are the guidelines you should follow:
Do not paint with an oil-based paint over latex paint. This will cause peeling and chipping.
You can use latex paint over oil-based paint, but it requires more prep, primer, and multiple coats. This is essential if your garage door is wood or vinyl. You don’t want to spend all this time painting your door just to end up with chipped paint again!
On metal, use oil-based paint if it is already painted with oil-based paint. This is a no brainer. Oil-based paint protects metal better than latex, and painting latex over oil requires more prep.
Don’t forget to check your trim. If you’re painting the door, you probably want to paint the trim as well. Make sure you check to see what kind of paint is used on the trim. It may be different from the door itself!
[googleadsycc adunit=”inarticle”]
How to Tell What Kind of Paint was Used on a Garage Door
You probably think these tips are all well and good, but how do you know what kind of paint the previous homeowner or builder used to paint the garage door. There is a simple test.
Prepare a small bucket or bowl with a mixture of water and dish soap. Soak a rag in this bucket and wring it out.
Using the damp rag, clean a small part of the door that is in an inconspicuous location.
Allow to dry or dry with a paper towel or a rag.
Dip a paper towel or q-tip in denaturated alcohol or nail polish remover.
Rub it along the clean patch on the door.
If the paint comes off, latex paint was used. If the paint doesn’t come off, oil-based paint was used.
This test is super simple, and since you’re going to be painting your door anyway if you rub a little paint off, it isn’t really a big deal.
Picking the Best Paint for a Garage Door: The Chart
If your garage door is…
Latex Paint (water-based)
Oil-Based Paint
Vinyl/composite/fiberglass
Should use
Should NOT use, may cause cracking and peeling
Metal with oil-based paint or bare
Can use, but not the best
Should use
Metal with latex paint
Should use
Can use, but must remove latex paint first
Wood with oil-based paint
Should use, but must take extra care with prepping the door and use a primer
Should NOT use, may cause cracking and peeling
Wood with latex paint
Should use
Should NOT use, will not adhere properly
Wood with stain
Should use, but must take extra care with prepping the door and use a primer
Should NOT use, may cause cracking and peeling
Wood with no previous treatment
Should use, but must take extra care with prepping the door and use a primer
Should NOT use, may cause cracking and peeling
[googleadsycc adunit=”inarticle”]
Which Brands Make the Best Exterior Paint for Garage Doors?
Because the garage door has a huge impact on the look of your home, this is not the time to cut corners or go with the cheapest paint on the shelf. You want a good quality paint that will last so that you don’t have to do this particular task for several years.
Here are some quality exterior paints that should look good for 7-10 years after you complete the work:
You’ll notice that you can’t just choose based on brand. Every paint brand offers different levels of quality. If you pick the premium or highest quality paint of any brand, it is going to be better than the lowest quality paint of another brand. For example, high-quality Glidden is going to better than a low-quality Sherwin-Williams, even if Sherwin-Williams is generally considered a better brand.
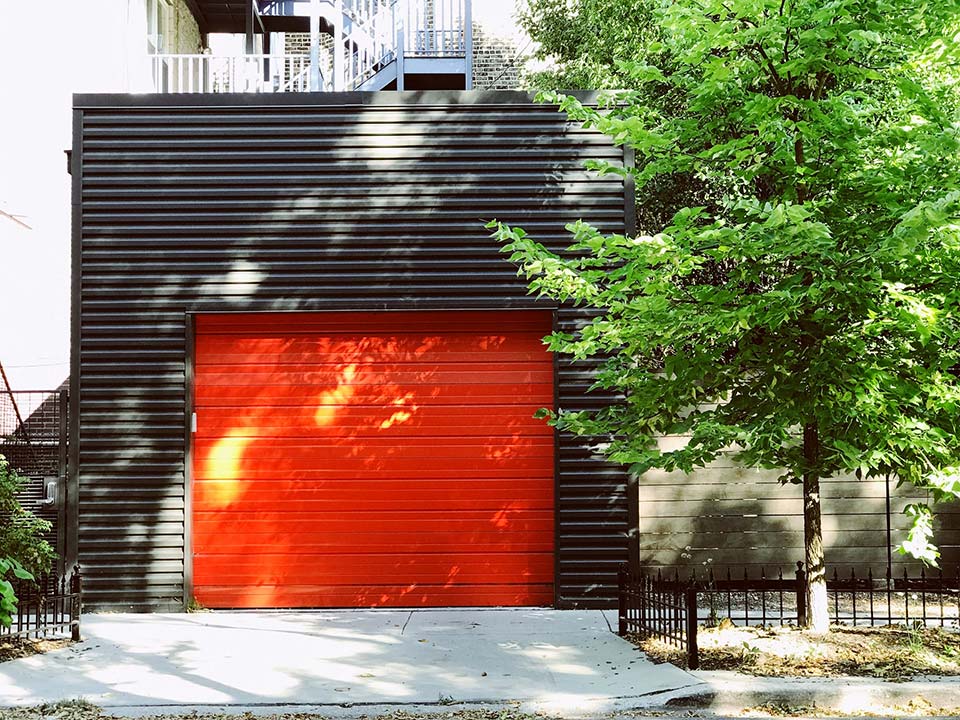
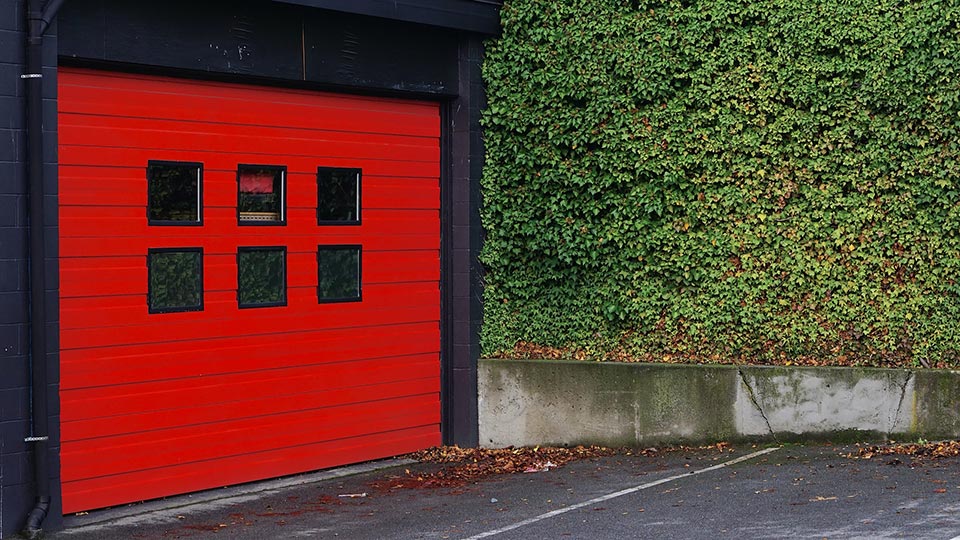
Picking the Best Paint Color for a Garage Door
Photo by Emil Diallo on Unsplash
Picking the paint color is the hardest part of painting your garage door. Here are our thoughts on some common options:
White: You can’t really go wrong with white. Most garage doors are white. This look goes especially well if you have other trim on your home that is white.
Light neutral tones: Think of whites, tans, and grays. These are also fairly safe, depending on the color of the rest of your home.
Darks: Dark garage doors make a bolder statement, but they are a little riskier and more difficult to paint over with a lighter color in the future. If your garage door is attractive, then a dark color can make it a highlight.
Reds, blues, and greens: When using these colors, you’ll probably want to do for a dark muted version of them. Like darks, these are bolder choices.
Go for contrast: The one thing that we really don’t like the look of is a garage door that is too close to the color of the house. If the siding of a house is light blue, the garage might be white, a very light off-white, a very dark blue, or a dark neutral.
Consider the accent colors and materials of your home: if the trim around your windows, your door, your front porch, and your garage are all different colors, you won’t achieve a cohesive little.
[googleadsycc adunit=”inarticle”]
What Color Should the Trim Be?
Garages usually have trim around them, and there are a couple of different things you can do with the trim. We recommend buying some sample-sized paints and trying them out to see which fits better.
Paint the trim the same color as the house.
Paint the trim the same color as the door.
Paint the trim a lighter or darker color than the door.
Paint the trim the same color as other trim on the home.
The last option is the one we most commonly see, but plenty of people go for the other options and have great results.
Can You Paint the Inside of a Garage Door?
You can and should paint the inside of a garage door! Whether you use your garage for your home gym, workshop, a place to hang out, vintage car, or heck, your everyday ride, putting a fresh coat of paint on the inside of your garage door will instantly add to the atmosphere in your garage.
Although the inside of your garage door is technically on the interior of your home, we still recommend using an exterior paint if possible because (most of the time), it is still exposed to extremes in temperatures, moisture, and wear and tear.
If you rarely open your garage door and have a climate-controlled garage, you might be able to get away with using interior paint.
Best Colors for the Interior of a Garage Door
The color for the interior of the garage door that you pick is really going to depend on your personal style and what you use your garage for.
Same color as the walls. If you want the garage door to feel like a wall, then you should make it match the walls. You can draw attention away from the door by adding an accent wall somewhere else in the garage.
A contrasting color to the walls. If you want to highlight that this is a garage, then you could paint it a different color from the other walls to draw attention to it.
Something light. Remember, garages tend to be dark, so using a lighter color paint can help brighten up the place.
Something cheerful – or team-spirited. Get creative if you want! If your garage is where you watch football with your buddies, then you could paint the door in a team color or green and white like a football field. It’s your space, so choose to do something that speaks to you!
How Much Paint Do You Need for a Garage Door?
Most of the time, a single gallon of paint is enough to paint a garage door on a 1-2 car garage with some leftover. However, this depends on how many coats you need, which depends on several other factors. You may need more than one gallon of paint if:
You’ve used a primer. If you needed to use a primer, then you might only need one coat of paint.
You’re painting a surface that has never been painted before. Even with a primer, bare wood may need a second coat of paint.
You’re painting a lighter color over a darker color. You’ll definitely need at least two coats in this situation, and you might need even more. We recommend priming first.
Your garage door is oversized. It only makes sense that wider or taller a garage door is, the more paint you’ll need.
You have to paint over a lot of imperfections. Even if you’ve tried to sand down imperfections in the door, you might need more paint to smooth those out when it comes time to paint. In this case, it is best to use a primer and probably two coats of paint.
[googleadsycc adunit=”inarticle”]
If you aren’t far from a home improvement store, then you can get a gallon of paint to get the job done. If you have some leftover, that’s great because you might need to touch up later. If you need more, you can always run out.
But if getting to the home improvement store is a challenge, it might be worth getting two gallons of paint so that you don’t have to make another trip out.
Can You Spray Paint a Garage Door?
Photo by Thomas Le on Unsplash
You might think that spray paint will be an easy way to get your garage door painted, but honestly, it isn’t the best idea. Here’s why:
It will take a lot of spray paint, and you’ll spend way more than you need to.
It is really hard to get a nice even coat of spray paint.
Spray paint is typically oil-based, making it a poor choice for such a large and important application.
Spray paint creates a lot of fumes. If you plan on hanging out in your garage, you’ll experience lingering and noticeably odors.
If you want to make the job easier, consider learning to use a paint sprayer. When used properly, paint sprayers create the best finished product in the least amount of time.
The Best Paint for Garage Doors
Interior or exterior, the best paint for a garage door is almost always a premium-quality exterior latex paint. If your garage door is metal, oil-based paint will hold up a bit better, but latex paint is just fine.
When painting inside your garage door, you can choose to use interior paint if your garage is climate-controlled.
It’s as simple as that! Now all you have to do is pick a color!
Skis are long and cumbersome, and they can be difficult to store. You don’t want your expensive ski sets getting damaged because they’re just leaning up against a wall in your garage, so if you’ve got skis at home, you should be looking into ski storage solutions. Not all storage solutions are made the same, though.
A cluttered garage can be infinitely frustrating and can be a source of anxiety and stress because you procrastinate in cleaning it up. Skis are delicate and easily scratched though, so you don’t want your pricey set getting scuffed up by the other stuff in your garage. Putting up a storage rack is an easy project that will take less than a couple hours.
What is Garage Ski Storage?
Ski storage for a garage usually comes in the form of either vertical or horizontal storage; which one you choose will be dependent on the wall space you have and your personal preferences, as well as how many sets of skis you have to store. The best sets also have places for poles and other gear so you can have everything in one easy to reach place.
We picked out the top 13 garage ski storage solutions listed on Amazon, as determined by their position on Amazon’s best sellers listing for ski storage. Here they are; each will be described in more detail throughout the rest of the article:
If you have a garage and you have skis, you probably store your skis out there. They can take up quite a bit of space, and you want them to be easily accessible for when you want to get them and hit the slopes. If you don’t have a good storage solution, though, you’ll likely run into issues with your skis. These issues can include:
Damage to your skis
Lost equipment because it’s stored separately
Damage to other stuff in your garage
stress from a cluttered garage
Garage ski racks are relatively cheap (cheaper than replacing a set of skis for sure), and they’re easy to mount. All you’ll need is a tape measure, level, and a screw gun to put up the vast majority of them, and it’ll only take a couple hours to do. You need a good ski rack in your garage if you own some skis to protect your gear and your sanity.
Evaluation Criteria for a Good Ski Storage Solution
If you’re in the market for a ski storage rack, there’s a number of features you’ll want to consider. Obviously, price is a key factor; you don’t want to spend a fortune on a rack. You probably want a solution that can at least hold the poles for your skis as well, so everything is kept in one place.
Some ski storage racks have shelves as well so you can keep your protective gear and boots there as well. You’ll also want to consider how many skis you have to store; obviously if you have five sets, you won’t want to get a rack that only holds three pairs of skis. Most ski racks have hooks that are covered with something soft to avoid damaging your skis as well.
[googleadsycc adunit=”inarticle”]
Finally, consider the amount of space you have in your garage. Vertical ski racks will take up more space vertically, while horizontal ones will be the opposite. There are also floor racks you can use. Depending on how much wall space you have in your garage, either of these might be better for you. Be sure to take some measurements before you purchase anything.
The 13 Best Ski Storage Solutions on Amazon
Without further ado, here are the top 13 ski storage solutions currently listed on Amazon, as determined by their position on the Amazon best seller list for ski storage.
StoreYourBoard Horizontal Storage Rack, 3 Pairs
First on the list is a three pair horizontal storage rack made by StoreYourBoard. You’ll notice quite a few racks made by StoreYourBoard on this list; they’re a leader in ski and snowboard storage racks and make a wide variety of them to fit every need. This rack is made of plastic, comes in black, and only weighs 13 ounces.
Apart from single pair storage racks, this is one of the cheapest racks on this list. It’s simple yet durable, and only measures 16.5” long, so you’ll be using your space efficiently. The racks are wide enough to be able to store other items on there as well, so whether you have skis, snowboards, or water skis, you can use this multi-purpose rack to meet your needs.
StoreYourBoard Ski and Snowboard Wall Storage Rack, 10 Pairs
Next on the list is another StoreYourBoard ski rack, albeit one with a lot more storage. The Ski and Snowboard vertical storage rack will hold all your skis in one place, along with a hook for each to hold your poles as well. Each set of hooks will hold two sets of skis or one snowboard so you have options for all your gear.
This rack holds all types of skis, so whether you have racing skis, slalom skis, or cross-country skis, you’ll be able to put them in this rack. If you mount it correctly, it’s rated to hold up to 200 pounds, so you don’t have to worry about weight either.
Ultrawall Ski Wall Rack, 5 Pairs
Another good choice is the five pair vertical storage rack made by Ultrawall. Similar to the StoreYourBoard rack above, it has a spot for your skis and the poles right behind them so all your gear is in one easy to reach place. The hooks can also move along the steel rail so you can customize the fit to what you need.
Your skis will be stored between rubber-coated hooks so they won’t get damaged either, and this rack can also hold snowboards if you need it. It’s easy to mount and you can use studs or drywall to mount it; it has the parts you’ll need no matter what.
StoreYourBoard Omni Ski Wall Rack and Storage Shelf
If you’re looking for an all-in-one solution to store all your gear (not just your skis), look no further than this vertical storage solution with integrated shelf by StoreYourBoard. The attachments can slide along the rack so you can fit in whatever types of skis you have, and the overhead shelf can hold a bag, goggles, gloves, helmets, or boots to keep it all together.
Mounting hardware is also included so you can put it up in very little time. The shelf measures 46” x 15.5” and can hold up to 100 lbs. of gear when mounted properly. You’ll clean up your garage in no time with this compact, all-in-one ski storage solution.
Maybe you’re looking for a less permanent solution, or you don’t have a lot of space on your wall, or you just need some portable storage for your skis. Look no further than this five pair freestanding floor ski rack, made by StoreYourBoard. It’s made of rigid plastic but it’s strong enough to support your skis, and it has the added benefit of being able to move.
You can bring this rack to the lodge to store your skis in your hotel room, a nice benefit as well. If you have wide skis, it’ll only hold four sets though, and it doesn’t have storage for poles or other gear. This option might be good for someone who does a lot of traveling with their skis but still wants a nice storage solution for their garage as well.
Wealers Wall Mounted Rack Organizer, 3 Pairs
If you’ve only got a couple pairs of skis, there’s no reason for you to go out and buy a rack that can hold ten sets. That’ll be overkill. This vertical storage option will hold three sets of skis, and doesn’t take up much space on your wall either. There’s even a nice hook next to the ski hooks that will hold your poles, so you’re not sacrificing function even though these are cheaper.
This rack is coated with a weather resistant coating, so even if your skis are still wet, the hooks won’t corrode or rust. They’re also padded to keep your gear from slipping off and getting scratched or damaged.
StoreYourBoard Ski and Snowboard Ceiling Storage Rack
Not all racks mount on the wall, however. This cool rack by StoreYourBoard mounts to your ceiling so you can take advantage of every square inch of space your garage has to offer. It’ll hold up to 150 lbs. of gear, and can hold up to five sets of skis per side. The storage arms are also padded to protect your skis or snowboards from being damaged.
[googleadsycc adunit=”inarticle”]
The rack is surprisingly customizable, with extendable arms and varying height from 10” to 18” so it fits your needs. The bracket also rotates so you can be sure it’ll work no matter how your ceiling joists are arrayed.
Rough Rack 4-8 Ski and Snowboard Ski Rack
Next up on the list is this storage rack by Rough Rack that can hold either eight sets of skis or snowboards. It doesn’t have dedicated hooks for poles, though, so adding poles in will likely take away some of your ski storage space. The rack provides 45 inches of hanging space so you’re getting great utility out of this item.
The rack comes with all the mounting hardware you’ll need so you can get it mounted and done easily and quickly. It’s rated to hold over 100 lbs. of equipment when mounted properly, so you can keep all your gear in one place without worrying about it falling off the wall.
Wealers Single Set Wall Mounted Rack Organizer (Set of Two)
Maybe you don’t need storage for anything more than one or two sets of skis, and you don’t want to install a huge rack in your garage. This set of two single-set ski hooks has you covered. If you only need one, the other can hold a variety of sporting equipment or it could hold your boots, helmet, or other gear too. It won’t corrode or rust due to a special coating on the hooks.
You can fit one set of skis and one set of poles on each of these hooks, and they have the benefit of being able to be placed anywhere. Say goodbye to clutter and organize your garage without sacrificing a lot of wall space.
Koova Snow Ski Rack Wall Mount, 4 Pairs
This storage rack by Koova will hold up to four pairs of skis with their pole, but it’s designed to hold the skis at the bindings rather than the tips (which is where most of the other racks on this list hold them). This keeps the stress off the tips and prevents them from bending or breaking. The rack comes with all required hardware for simple mounting.
Koova provides a lifetime warranty on their product, which is a very nice added benefit of purchasing this rack system.
Stormann Ski Wall Rack, 5 Pairs
Stormann also makes a five-set ski rack that will store your skis vertically with the poles behind them. It’s very similar to some of the other racks on this list, where it stores the poles on hooks behind the skis for easy access. The hooks also adjust so you can accommodate whatever types of skis you have.
The hooks are durable and will resist rust or corrosion, and they’re coated with a rubber sleeve so they don’t scratch your skis either. You can easily install it in a couple of hours because it includes all the necessary hardware for mounting.
StoreYourBoard Timber Ski Wall Rack, 4 Pairs
If you’re looking for a hardwood rack instead of a metal rack for aesthetic purposes, look no further than this stylish rack by StoreYourBoard. It’ll hold up to four pairs of skis, but you may have to get an additional storage solution for your poles, since the hooks only fit a set of skis. This also won’t work for snowboards.
However, the finished wood rack provides a nice alternative to the black metal or plastic racks that make up the vast majority of ski racks, so if you’re worried about how your rack looks, this will meet your needs. It’s also furniture-quality, meaning the hooks won’t rot due to getting wet from your skis.
Sunix Ski Storage Rack, 10 Pairs
This storage system from Sunix is fully customizable and features heavy duty mounting brackets and metal to allow you to store over 200 lbs. of gear. You’ll get five extra-long storage hooks and one set of short storage hooks so you can hang up 10 sets of skis and any other equipment you want to store on here.
The hooks can also slide along the rack so you can fit whatever you need to, then secure them to the rack once you have the layout you want. You can also use these hooks to hold a snowboard as well. Sunix provides a 30-day money back guarantee, so you can rest assured that if you’re not satisfied you can get your money back.
Closing Thoughts
There’s no reason to keep dealing with the clutter and annoyance of skis being spread throughout your garage with all these great, affordable options for garage skit storage solutions. Whether you have one set of skis or ten, these minimalist racks will take up very little space and allow you to take back your garage once and for all.
Gone are the days of having your expensive skis damaged or scratched because they’re leaning up against a wall in your garage. Any of these ski racks mentioned above will help you organize your gear so you can spend more time on the slopes and less time looking for equipment.
Dreaming of giving your garage a makeover? When it comes to the options of what to do to those walls, plaster offers a solid and durable material. Though it may not be a professional’s top pick, that is mostly because plaster is a major job. And it can also be a messy job. But, the beauty of the finished project often outweighs the amount of time and energy it requires.
Is Plastering Garage Walls: Good or Bad? Applying a plaster finish to your garage walls has its pros and cons, yet the majority of the time, the pros are viewed as being worth the downfalls.
Pros:
Durability
Look of the finished product
Cons:
Difficulty in repairing damaged plaster walls
Difficulty removing plaster when it’s time for a change.
We asked the professionals what they thought about plastering the garage, here’s what they think:
Can You Plaster Garage Walls?
If you’re getting ready for some renovations in the garage, you’ll need to think about walls. Finishing a naked garage can be a major project but will also be majorly gratifying when it’s done. Can you picture it in its final state? Will plastering your garage walls give you the effect and finish you’re looking for?
[googleadsycc adunit=”inarticle”]
You’ll want the plaster surface to hold up to the demands that a garage wall material needs to. Garage walls are typically plain and in need of a personal touch. Plaster can give your room texture and touch that plywood cannot.
As for the question of can you plaster a wall, the answer is yes! Homeowners and professionals have been using plaster for centuries for a wide variety of construction needs, including walls. Cement plaster is the most commonly used type of plaster for walls that need to stand up to the trauma we put our garages through.
Is Plastering Walls Good or Bad?
Plastering a wall can be a messy job but is relatively simple to work with. It may take someone that is not a professional longer than they had hoped, but in a technical sense, plaster is a user-friendly material.
One major reason that plaster is not a professional’s top suggestion for a garage wall is that plaster is not the ideal material for hanging shelves or other heavy objects from. If you do not plan on using the walls to hang a workbench from it, then carry on.
Using plaster for a wall finishing material has been used for a very long time, and for some, that means the practice is outdated. It is hard to believe that something so reliable can be tossed aside because the idea isn’t modern.
Repairing damaged plaster can be one of the major downfalls of choosing plaster as your material choice. Repaired patches should be done by an expert to get it as even as possible. Even having it done by a pro, the color of the new plaster and the old may differ because plaster tends to discolor over time.
Types of Plaster for the Job
Though plaster seems to be a relatively simple process, there is a ton of work done before that bag of powdered plaster hits the retail shelves. There are several different types of plaster used for home renovation and decoration. Other types of plaster are used for medical reasons like casts for broken bones and used in the dentist’s office for casting molds of your teeth.
Of course, you would not want to use one type for the wrong application. All plaster is not the same. Let’s go over the most popular types of plaster used in the home-
Lime- Limestone is a naturally occurring mineral. When ground to a powder and mixed with several other elements and water, it is a great building and finishing material for walls and other structures.
Though it is most often used outdoors, in theory, it works quite well for indoor use. It is more durable than any other material used for plastering walls. It does take a longer time to set than other plasters.
Cement- Cement plaster is possibly the most commonly used material for plaster. Cement is a mixture of many elements, including sand.Other than plastering, cement is used for a wide variety of other uses. Since it is so commonly used, the price of cement is the most affordable out of all the options.
Gypsum (plaster of Paris)- Gypsum is a naturally occurring soft mineral. When mixed with a few other elements, it becomes a workable yet delicate material. It is not often used for a building material on its own, but it is commonly mixed into cement.
[googleadsycc adunit=”inarticle”]
Plaster of Paris (Gypsum) is a popular material used in crafts such as vases for flowers, and sand-cast molds of your children’s handprint. Gypsum is also used for things like chalk.
Clay- Using clay as a building material is an ancient construction practice. Though it may be natural and beautiful, clay is not the ideal garage wall covering simply because clay has a nasty habit of cracking when it dries and settles. It may even warp or look distorted.
Plasterboard- Also known as drywall, or sheetrock. Panels of plasterboard are easier to work with than applying wet mixtures of plaster and smoothing it out. It will also result in an even finish and be ultra-smooth to the touch without all the sanding.
Plaster vs. drywall. Plaster is a much bigger project, and the outcome is often a more textured artistic finish. Drywall is a cleaner and simpler project, with a smoother finish. Sheets of drywall are sold at most home improvement stores in 4′ x 8′ panels.
Why Plaster?
Garage-Wall-Plastered
Home remodeling and home improvements often require tons of research and consideration. While one material and method work best for one person, it doesn’t mean that it is the best choice for you. Have you always dreamed of mixing bucketfuls of plaster to makeover your home’s garage? Go for it!
The reason most people choose to work with plaster is that it can be easy to work with and result in a beautiful finish. Not only is plaster a good wall covering, but this material makes for an incredible decoration medium. Plaster castings of fancy designs or figures are quite popular.
DIY Project
Can anyone plaster a wall, or is it a job that is best left to the professionals? Though plastering can be touchy, it can definitely be done by a weekend warrior (and maybe a helper.)
[googleadsycc adunit=”inarticle”]
A professional may argue that they can achieve better results than you, but it is up to you to prove them wrong. Do your homework and watch a few tutorial videos before jumping right into it. Calling on a friend that has more experience with plastering could be a wise idea.
A home renovation project, such as plastering a wall, will be made much easier if you properly prepare yourself with the right tools and a clean space. Jumping into a project like this can turn out to be a total messy disaster if you do not set yourself up for success. Take the time to gather these materials and tools.
Not into home renovations or messy jobs? There are plenty of professionals out there for hire that will do an amazing job that you can be satisfied with. Ask around for recommendations. For those that decide to carry out the project themselves, the following will be a helpful start.
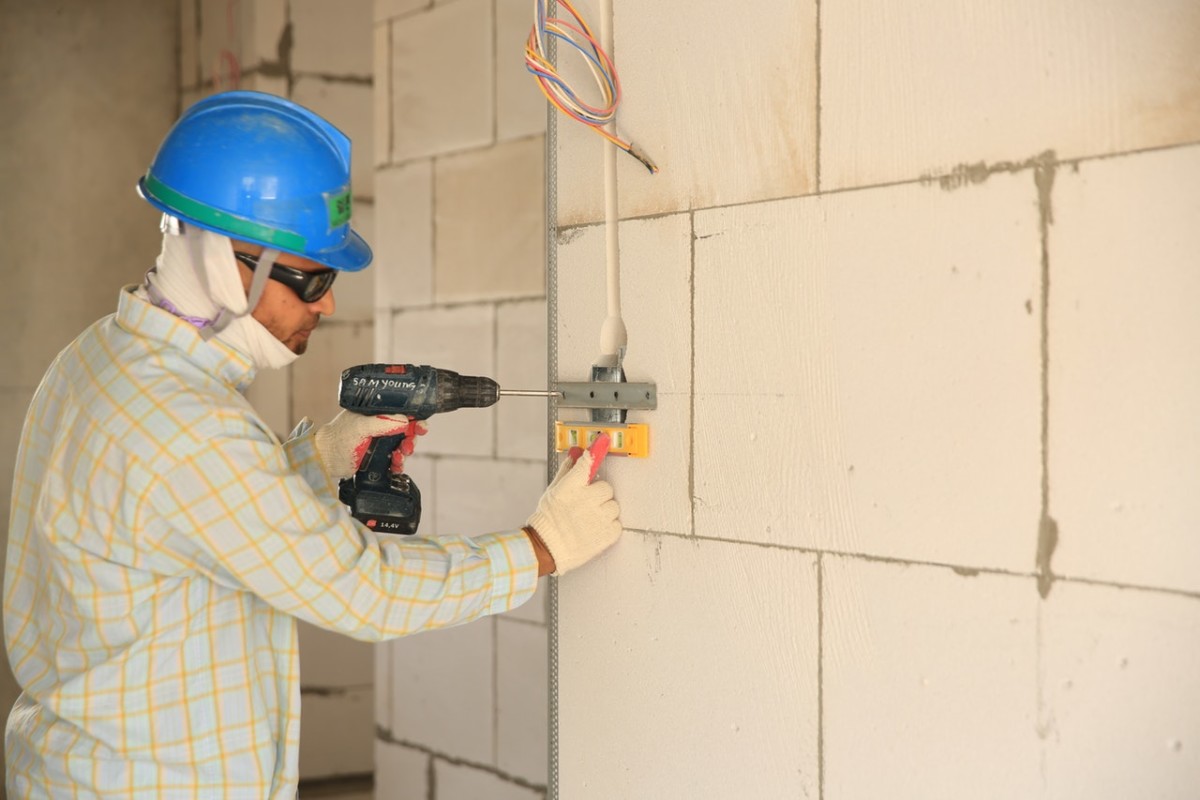
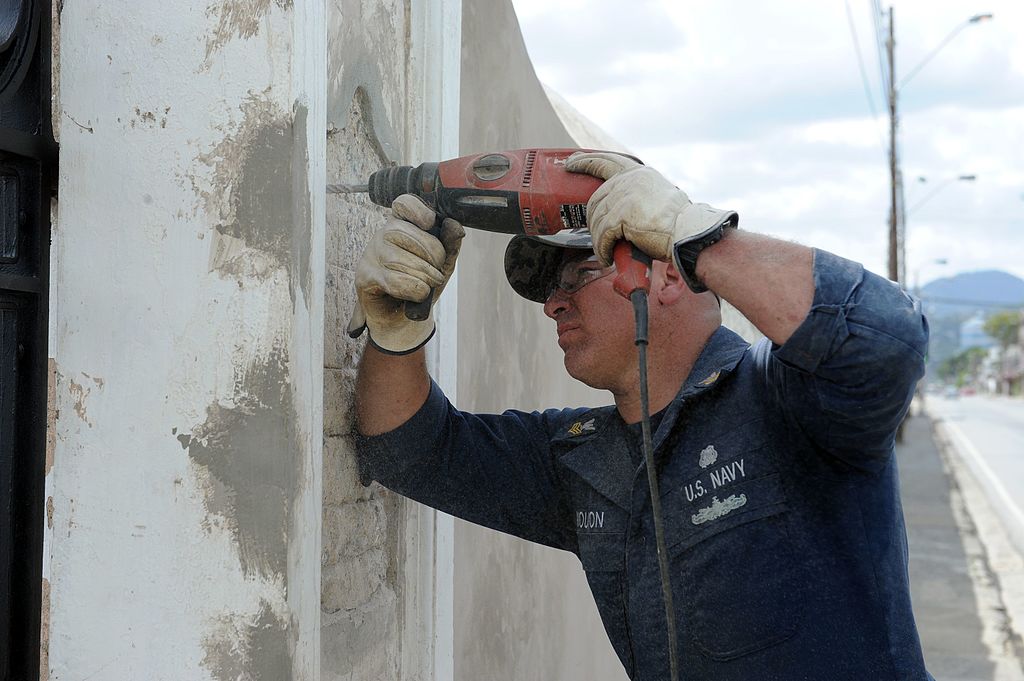
If you have a garage, then at some point, you’re probably going to want to drill a hole in it so that you can add storage options, run wires and cables, or even hang décor, but you’re probably wondering if this is wise.
So, can you drill a hole through the garage wall? Yes, you can drill a hole through a garage wall as long as you do it the right way. To ensure you do an excellent job, be sure to follow these steps:
Ascertain structural integrity
Check the walls carefully
Gather the necessary tools
Be keen on general safety
Sharpen your drilling technique
Read on to find out how to drill a hole through a garage wall the right way.
Tips for Drilling a Hole Through the Garage Wall
Keep the following tips in mind before drilling through your garage hole.
1. Ascertain Structural Integrity
Before making any hole, ensure the wall passes the integrity test. Inspect the wall for any cracks or suspicious-looking openings. The wall should be straight rather than leaning to one side.
Remember that a warped ceiling and a door that no longer closes appropriately can also be signs of structural damage, according to “Top 10 Signs of Structural Damage to Houses.”
[googleadsycc adunit=”inarticle”]
Only drill through a wall that you are sure won’t crack or become damaged by a hole. It is worth noting that if your wall can’t withstand a few holes from a drill bit, it is probably time to renovate your garage!
2. Inspect the Wall First
Before attempting any drilling work, make sure you use an inspection device to determine what lies beneath the wall. Remember that some walls have electric wires passing through. Some feature plumbing work. Drilling through such walls can end up causing problems.
An inspection device such as a stud finder, cable detector, and pipe detector helps you determine precisely where wires and pipes go through. That makes it easier for you to create clean holes without interfering with existing wires or pipes.
3. Use the Right Drill Bit
The type of material used to construct your garage wall should determine the kind of bit you use when drilling through the wall. A drill bit meant for use on wood should not be used to drill through a concrete wall because the bit would end up getting ruined.
[googleadsycc adunit=”inarticle”]
The opposite is also true. You should not use a concrete drill bit to drill through wood or drywall because you can cause unnecessary damage. Some examples of different drill bits include the flat wood bit, tile bit, masonry bit and twist bits.
4. Mark Holes Accurately and Clearly
Before you start drilling into your garage wall, make sure you take measurements twice and mark the locations where you are going to drill. This ensures that you get the right measurements, and you do not ruin your walls.
Mark the walls with a noticeable mark to be sure you do not lose your bearing as you drill through different parts of the wall. If you make your marks too faint, they may end up becoming covered with dirt, or you may mistake a bit of dirt for one of your pencil marks. If you measure correctly, the mark will be removed by the drill hole, so you don’t need to worry about leftover marks.
5. Make Pilot Holes
Before drilling large holes through the garage wall, start by making pilot holes. These are smaller holes that act as a guide for you when making the larger holes.
[googleadsycc adunit=”inarticle”]
Pilot holes are usually situated at the center and make it easier for you to maintain accurate bearings when drilling larger holes through the wall. Pilot holes act as your compass when drilling through walls that may seem too large for you to drill accurately.
6. Fasten the Chuck
Be sure to tighten the chuck, which is the specialized clamp that holds the rotating tool. A loose chuck can quickly spin out of control or fall out of the drill. It is almost impossible to drill a proper hole when the chuck is spinning out of control.
Some chucks can be tightened using your bare hands, while others require you to use a key. Regardless of the type of chuck on your drill, make sure you fasten it to get a tight grip. However, do not make it too tight as that may also cause drilling problems.
7. Take Note of Depth
While drilling, you need to know the depth of the hole you are making. Some drills have a feature that shows the depth you have already made. However, there are also those drills that do not have this feature. Wrapping tape around the drill bit at a particular point is a good way to know how deep you have drilled.
How to Make Drilling Easier
Keep the following details in mind if you want to make your drilling job less tedious and more impressive.
Practice Before Drilling
While drilling may seem like a relatively easy task, the truth is that it can get a bit complicated for an unsteady hand.
If you’ve never used a drill before, you might be surprised by the strong vibrations it puts off or the power of the drill’s torque. Being inexperienced with these things can easily cause you to drill a crooked hole. Practicing your drilling technique helps you get a steady grip that prevents making holes that may not be accurate or straight.
Gather the Necessary Tools
It is prudent to collect all the necessary tools you will need for the job. This will help you avoid having to stop in the middle of the drilling job just to rush out and bring something else. Some of the things you should have in your toolbox include a hammer, different drill bits, markers, tape, cutting, and measuring tools.
[googleadsycc adunit=”inarticle”]
Safety is Key
Many unexpected things may happen when you are drilling a hole through your garage wall. That is why you must adhere to all safety rules.
Make sure you are wearing goggles to protect your eyes from the debris that is likely to be produced.
Wear gloves that have proper lamination. That will prevent your hands from getting sweaty while giving you a firm grip on the drill.
Wear a helmet to protect your head from falling objects that may result from the vibration effect of the drill.
Keep all nails and tools in a secure box to prevent tripping over items.
Do not allow children or pets to play nearby while you are drilling in your garage.
Take a Break
If you are getting tired, don’t strain yourself with the work. Drilling while you are tired can result in poor quality work. Taking five or ten-minute breaks between drilling sessions is an excellent way to replenish your energy levels and ensure better focus, resulting in better quality work.
[googleadsycc adunit=”inarticle”]
In Conclusion
Drilling through the garage wall is a relatively easy task. All you need to have is your safety gear and the correct type of drill and drill bits. Practicing your drilling technique is also key to ensuring success when you start the drilling process.
Before you start drilling through the garage wall, make sure you have enough time to spare. Do not rush through the process because minor errors can turn out to be quite expensive. Otherwise, the drilling process itself should be relatively easy and fun.
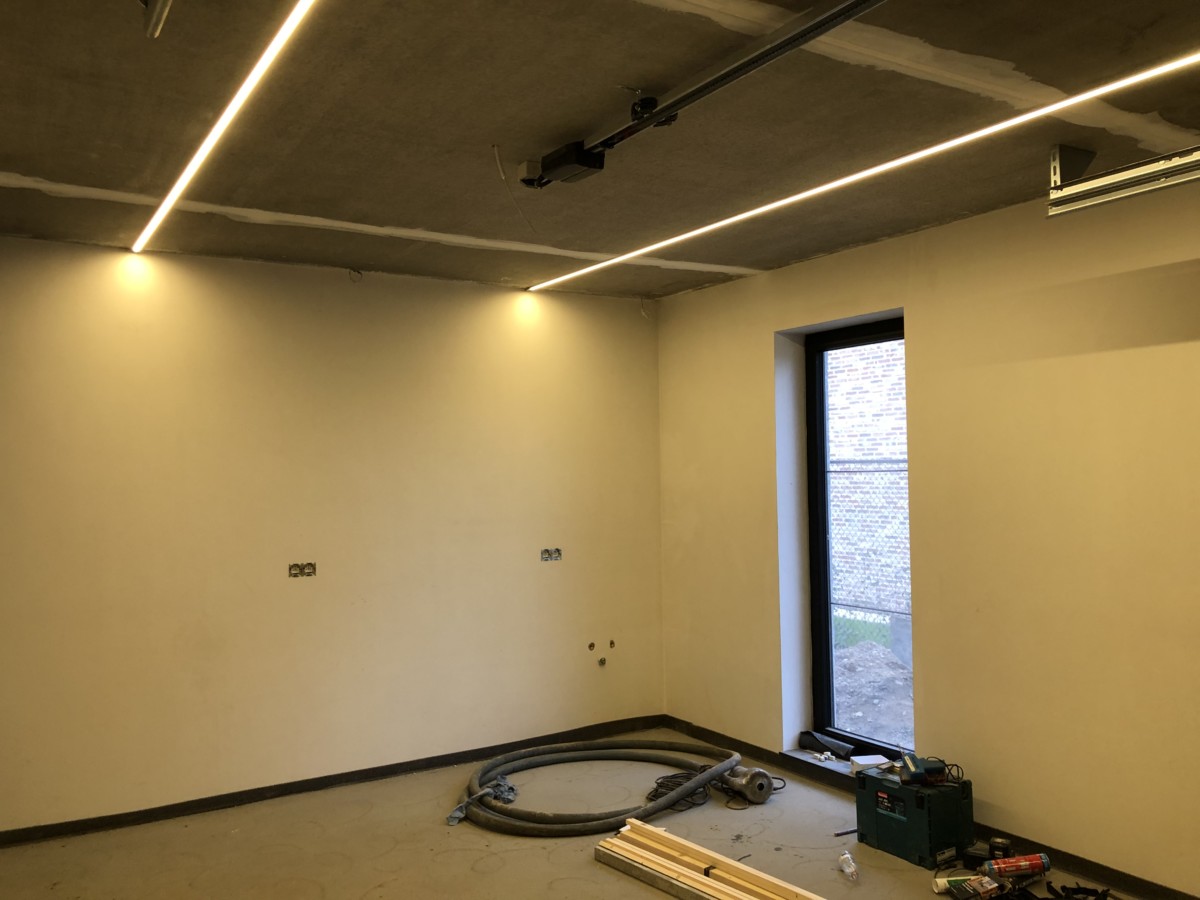
As you pull out from the driveway each day, you walk past your bland garage and think, ‘This space is just begging for a new paint job.” If you’re ready to spruce up the place, there are plenty of rookie-mistakes you should avoid in the process!
Can you paint unfinished garage walls? Yes, you absolutely can. However, garage walls already have a thinner drywall layer than interior rooms. If your garage is unfinished or without drywall, it will be even thinner and require specialty paint, primer, and technique. You will want to avoid interior wall paint like satin or gloss and lean more towards oil-based primers, latex, and exterior paints that are mildew resistant.
If you are ready to freshen up your garage and give it the fresh coat it deserves, this article can guide you through the differences that your unfinished garage possesses versus a finished garage, the steps for how to paint your unfinished walls, as well as the best paint brands for the job!
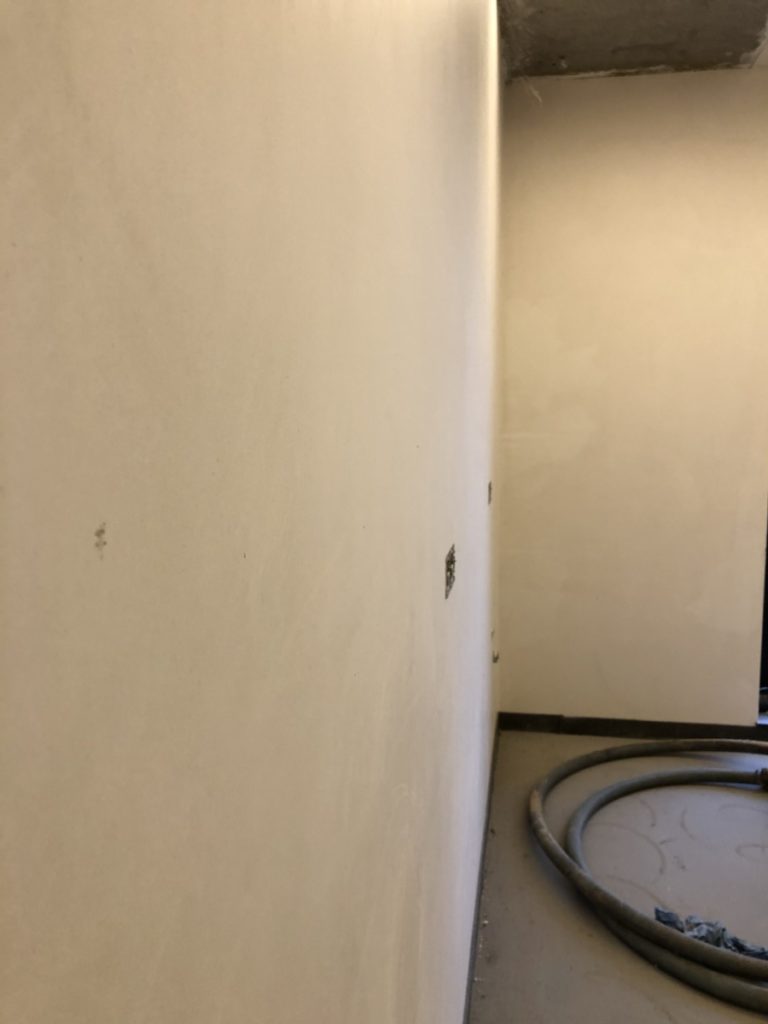
Why is Painting Unfinished Walls Different?
Before planning your paint job, you should understand the significant difference between what you’re up against versus someone that has a finished drywall garage.
If your garage is finished, it will feature complete:
Drywall
Painting
Trim around the doors and windows
Insulation is optional, but many prefer it in colder climates
If you have an unfinished garage wall that does not have any drywall attached, you may consider drywalling your walls first. Yes, this is an extra step, but it will make your walls thicker, more durable, more noise-resistant, and more insulated.
To reiterate, you do not needdrywall, but it will help the paint go on more smoothly and avoid having to drywall over your paint job later down the road. It will also raise the value of your home, so if you plan to sell, this is a great way to increase your home’s property value.
[googleadsycc adunit=”inarticle”]
Steps to Paint Your Unfinished Garage Wall
If you are going to proceed without drywall or finishing your garage, you will require a primer before you begin to paint. The purposes of primer are to:
Seal the under-layers of the wall before you paint over it.
Offer an adhesive material that the paint can grip onto more easily than plain unfinished walls.
Binds the paint together and allows for a smoother finish.
The steps to paint your garage will go as follows:
Preparing Your Space
Pull the cars out into the driveway.
Clean the garage out because you don’t want dust and debris that can get stuck in your wet paint flying around.
All dirt needs to be removed because this will weaken your paint’s bind on each surface.
Take everything out of any electrical sockets and pull shelves out from the walls.
If there are any holes in the walls, use Vinyl Spackling and a Putty Knife to smooth over the holes and remove any irregularities before you apply paint.
Tape all of your electrical outlets, baseboards, ceiling, or areas you do not want the paint to reach. Utilize Painter’s Tape and do not take this step lightly because it can result in a messy paint job that looks worse than before you painted it. Aim for clean lines and lay down the tape firmly and adequately.
Spread drop cloth around your floor and consider lining it with plastic underneath as well.
Seal any cracks that want to be filled and straighten out the seam of your room. Avoid caulk made of silicon as this will not bind well with exterior paint in the garage. Utilize a caulk such as this Latex-Based Kwik Caulk in White.
[googleadsycc adunit=”inarticle”]
Ready to Paint
You will want to take the primer you’ve selected and pour it into a paint roller pan. You can use a combination of interior and exterior but avoid solely interior paints. Exterior paint has binding agents to protect from moisture, mold, weathering, and more. A great product we recommend is the Adhesion High Bonding Interior and Exterior Primer from KILZ.
Spread the primer paint into the paint rolling dish, use a paint roller to collect it in your pan, and start rolling it on! Avoid spots that tape is lining or any baseboards and ceiling edges. Do not gunk up as much paint as you can on the roller, or it will be chunky and mismatched.
Apply smooth strokes with a roller that is saturated with paint or primer but not soaked nor dripping.
The primer will need about 3 hours to dry, but you may want to give it a full day of airing out to be safe.
Follow the same technique the next day using your actual paint. Roll it around all walls, covering the space, and then allow it to dry for another day.
Step back to see your paint job from afar to determine if a second coat is needed.
If you can see paint lines, brush or roller strokes, or the color is not as dark as you were hoping, a second coat should fix all of this.
[googleadsycc adunit=”inarticle”]
Best Paint to Use on Unfinished Garage Walls
When selecting the actual paint you’re going to use on your unfinished garage walls, some key aspects to be aware of are:
Exterior paint is not required, and some feel that since it doesn’t rain or snow in your garage, it is unnecessary. This is a personal preference, but many also recommend using exterior paint or a combination of interior and exterior.
Avoid glossy paint as it will show every dent, mark, or scuff if you brush up against it. The garage is not a ‘delicate’ space, so avoid painting it with delicate paint materials. Semi-gloss paint will work better but is not as stain-resistant as matte.
Oil-based paints are very strong and reliable.
Latex Primers and paints are weatherproof and durable, great for outdoors or garage use.
Avoid egg-shell or satin paints if they are intended for indoor use.
Avoid latex paint that is not intended for indoor use. (must be exterior latex)
Some of the best paint brands we recommend for an unfinished garage are:
Rust-Oleum High Heat Spray – This is a coating to resist heat for automotive wear-and-tear, such as oil stains, rust, grease, humidity, etc. It is intended to protect your car, but many utilize this spray as a thin pre-coat to their paint. It offers an additional layer of protection which you can layer over the primer to resist humidity, or on the floor where oil and gas stains tend to build up.
Note: If you are painting on a cinderblock or an otherwise drywall free surface, this can be done with standard paint and any of the above-recommended paint brands. Many prefer to use spray paint as it will enter the crevices of cinderblock more easily than paint that is brushed on.
It will probably take a minimum of two coats, three if painting with a brush that needs to be pressed into the cinderblock texture.
Final Tips for Painting Your Garage Walls
Even if you choose white paint, won’t this be an improvement from those creepy unfinished walls that look like they belong in a haunted basement? Some final tips for painting your garage walls are:
Always allow your primer to dry thoroughly and do not jump the gun just because you’re excited and ready to paint. If you end up painting over drywall with standard paint, it will be challenging to create a smooth and even finish. Give it the time to mix with oxygen, dry out, and then apply your paint coat.
If your wall already has paint that you are seeking to cover, primer is not necessary.
You can always use a paint that has the primer already pre-mixed in.
In Conclusion
Your garage is easily painted, whether finished or unfinished. Opt for a paint that includes the primer as an all-in-one for the easiest method of coverage. Remember to use oil-based primers, latex, and exterior paints that are mildew resistant. After reading this article and following its advice, you’re sure to have a delightful coat of paint that adds more color to your everyday life!