

As you pull out from the driveway each day, you walk past your bland garage and think, ‘This space is just begging for a new paint job.” If you’re ready to spruce up the place, there are plenty of rookie-mistakes you should avoid in the process!
Can you paint unfinished garage walls? Yes, you absolutely can. However, garage walls already have a thinner drywall layer than interior rooms. If your garage is unfinished or without drywall, it will be even thinner and require specialty paint, primer, and technique. You will want to avoid interior wall paint like satin or gloss and lean more towards oil-based primers, latex, and exterior paints that are mildew resistant.
If you are ready to freshen up your garage and give it the fresh coat it deserves, this article can guide you through the differences that your unfinished garage possesses versus a finished garage, the steps for how to paint your unfinished walls, as well as the best paint brands for the job!
Table of Contents
Why is Painting Unfinished Walls Different?
Before planning your paint job, you should understand the significant difference between what you’re up against versus someone that has a finished drywall garage.
If your garage is finished, it will feature complete:
- Drywall
- Painting
- Trim around the doors and windows
- Insulation is optional, but many prefer it in colder climates
If you have an unfinished garage wall that does not have any drywall attached, you may consider drywalling your walls first. Yes, this is an extra step, but it will make your walls thicker, more durable, more noise-resistant, and more insulated.
To reiterate, you do not need drywall, but it will help the paint go on more smoothly and avoid having to drywall over your paint job later down the road. It will also raise the value of your home, so if you plan to sell, this is a great way to increase your home’s property value.
[googleadsycc adunit=”inarticle”]
Steps to Paint Your Unfinished Garage Wall
If you are going to proceed without drywall or finishing your garage, you will require a primer before you begin to paint. The purposes of primer are to:
- Seal the under-layers of the wall before you paint over it.
- Offer an adhesive material that the paint can grip onto more easily than plain unfinished walls.
- Binds the paint together and allows for a smoother finish.
The steps to paint your garage will go as follows:
Preparing Your Space
- Pull the cars out into the driveway.
- Clean the garage out because you don’t want dust and debris that can get stuck in your wet paint flying around.
- All dirt needs to be removed because this will weaken your paint’s bind on each surface.
- Take everything out of any electrical sockets and pull shelves out from the walls.
- If there are any holes in the walls, use Vinyl Spackling and a Putty Knife to smooth over the holes and remove any irregularities before you apply paint.
- Tape all of your electrical outlets, baseboards, ceiling, or areas you do not want the paint to reach. Utilize Painter’s Tape and do not take this step lightly because it can result in a messy paint job that looks worse than before you painted it. Aim for clean lines and lay down the tape firmly and adequately.
- Spread drop cloth around your floor and consider lining it with plastic underneath as well.
- Seal any cracks that want to be filled and straighten out the seam of your room. Avoid caulk made of silicon as this will not bind well with exterior paint in the garage. Utilize a caulk such as this Latex-Based Kwik Caulk in White.
[googleadsycc adunit=”inarticle”]
Ready to Paint
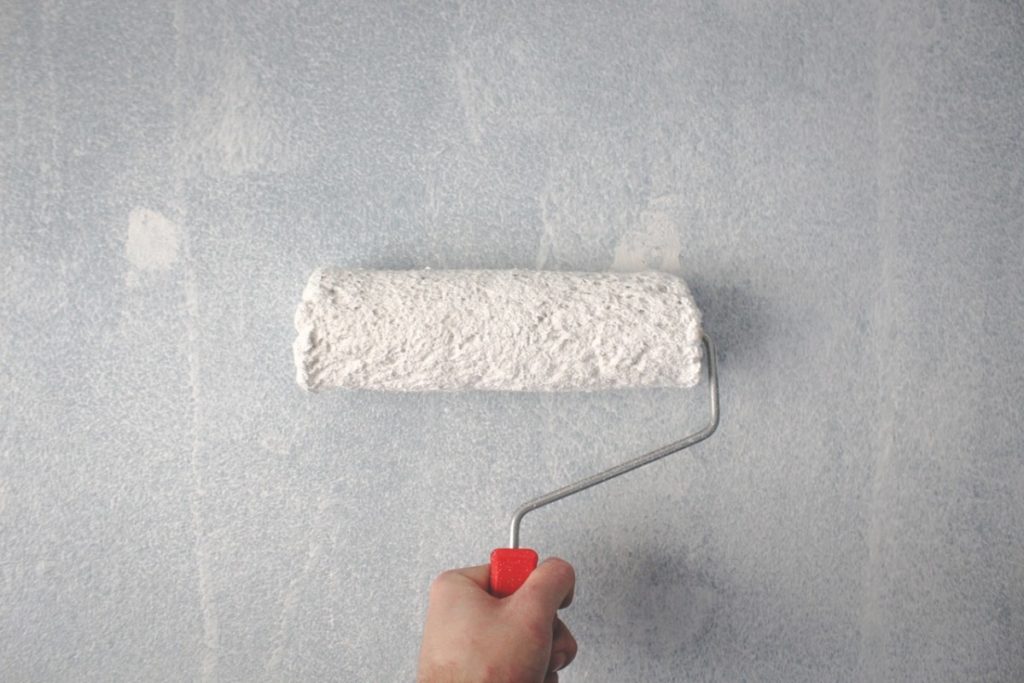
- You will want to take the primer you’ve selected and pour it into a paint roller pan. You can use a combination of interior and exterior but avoid solely interior paints. Exterior paint has binding agents to protect from moisture, mold, weathering, and more. A great product we recommend is the Adhesion High Bonding Interior and Exterior Primer from KILZ.
- Spread the primer paint into the paint rolling dish, use a paint roller to collect it in your pan, and start rolling it on! Avoid spots that tape is lining or any baseboards and ceiling edges. Do not gunk up as much paint as you can on the roller, or it will be chunky and mismatched.
- Apply smooth strokes with a roller that is saturated with paint or primer but not soaked nor dripping.
- The primer will need about 3 hours to dry, but you may want to give it a full day of airing out to be safe.
- Follow the same technique the next day using your actual paint. Roll it around all walls, covering the space, and then allow it to dry for another day.
- Step back to see your paint job from afar to determine if a second coat is needed.
If you can see paint lines, brush or roller strokes, or the color is not as dark as you were hoping, a second coat should fix all of this.
[googleadsycc adunit=”inarticle”]
Best Paint to Use on Unfinished Garage Walls
When selecting the actual paint you’re going to use on your unfinished garage walls, some key aspects to be aware of are:
- Exterior paint is not required, and some feel that since it doesn’t rain or snow in your garage, it is unnecessary. This is a personal preference, but many also recommend using exterior paint or a combination of interior and exterior.
- Avoid glossy paint as it will show every dent, mark, or scuff if you brush up against it. The garage is not a ‘delicate’ space, so avoid painting it with delicate paint materials. Semi-gloss paint will work better but is not as stain-resistant as matte.
- Oil-based paints are very strong and reliable.
- Latex Primers and paints are weatherproof and durable, great for outdoors or garage use.
- Avoid egg-shell or satin paints if they are intended for indoor use.
- Avoid latex paint that is not intended for indoor use. (must be exterior latex)
Some of the best paint brands we recommend for an unfinished garage are:
- Rust-Oleum High Heat Spray – This is a coating to resist heat for automotive wear-and-tear, such as oil stains, rust, grease, humidity, etc. It is intended to protect your car, but many utilize this spray as a thin pre-coat to their paint. It offers an additional layer of protection which you can layer over the primer to resist humidity, or on the floor where oil and gas stains tend to build up.
- Prestige Exterior Paint and Primer in One (Semi-Gloss)
- Glidden Exterior Paint and Primer (Semi-Gloss)
[googleadsycc adunit=”inarticle”]
Note: If you are painting on a cinderblock or an otherwise drywall free surface, this can be done with standard paint and any of the above-recommended paint brands. Many prefer to use spray paint as it will enter the crevices of cinderblock more easily than paint that is brushed on.
It will probably take a minimum of two coats, three if painting with a brush that needs to be pressed into the cinderblock texture.
Final Tips for Painting Your Garage Walls
Even if you choose white paint, won’t this be an improvement from those creepy unfinished walls that look like they belong in a haunted basement? Some final tips for painting your garage walls are:
- Always allow your primer to dry thoroughly and do not jump the gun just because you’re excited and ready to paint. If you end up painting over drywall with standard paint, it will be challenging to create a smooth and even finish. Give it the time to mix with oxygen, dry out, and then apply your paint coat.
- If your wall already has paint that you are seeking to cover, primer is not necessary.
- You can always use a paint that has the primer already pre-mixed in.
In Conclusion
Your garage is easily painted, whether finished or unfinished. Opt for a paint that includes the primer as an all-in-one for the easiest method of coverage. Remember to use oil-based primers, latex, and exterior paints that are mildew resistant. After reading this article and following its advice, you’re sure to have a delightful coat of paint that adds more color to your everyday life!

0 Comments