In its prime, your garage was a sight to
behold – siding that complemented the house, sparkly clean windows on the
roll-up door, utilities expertly connected under the gable, roof tiles perfect.
Now, your only image of that fine garage is a faded Polaroid photo that’s now
nearly 50 years old. Today, your garage looks like it’s sinking into the clover
in the backyard, the wood floor joists are rotten, and the walls are sagging.
Can it be saved?
Can you raise a garage? You can raise a garage – carefully, with an eye to caution and a
resolve to do everything that needs to be done while you have the garage lifted
up. It’s a daunting task, but not an impossible one. It might be the only way
to save your garage.
Garages are not held to the same construction
standards as dwellings. Different materials, different load/support
requirements, and different expectations for things like flooding, settling,
termites and more make garages’ lifespan much less than the homes they share
the property with. But since a garage is small – relative to the house – it’s
more fixable when things go wrong.
Symptoms of a Sick Garage
Houses settle. They sink into the ground. Not
severely, of course, but it doesn’t take much for problems to show themselves,
as with cracked drywall, doors that don’t close properly, bricks separating,
cracks in masonry, and in broken window glass. Depending on the soil, a house
can settle several inches over a 20-year period.
Garages settle as well, but often at a more
alarming rate, in rare cases as much as three or four inches in just a few
years. They do this for various reasons.
The ground wasn’t compacted well
enough.
The foundation wasn’t adequate.
The footings weren’t adequate.
Water runoff undermined the soil.
The soil composition did not
provide enough support.
And, since garages aren’t part of the living
quarters normally, there is a reduced sense of urgency to fix problems as they
develop. The procrastination leads to a more rapid descent into the soil in
many cases.
To a large degree, the symptoms are the same
as with a house – cracks in the foundation (or in the case of garages, concrete
slab floors), doors that no longer hang right, roll-up doors that get off track
frequently, beams and joists that should be level but aren’t, water rolls to one
side of the floor and creates puddles that don’t drain, etc.
Often, particularly perceptive individuals can just “sense” that things aren’t right. A settling or tilting garage can also be a trip hazard, as the floor buckles in places.
[googleadsycc adunit=”inarticle”]
Technically, What Happened Here?
When a structure settles, whether it’s a
house, garage, building, or the Leaning Tower of Pisa, it’s not really a
situation where the foundation is forcing its way into the subsoil because it’s
so heavy.
What really happens is that the subsoil – for
whatever reason – has vacated in various places, and the foundations sags into
the open areas. Now, we’re not talking about huge sinkholes or massive caverns
opening up under the structure. Many
times, it’s fractions of an inch. But any area where these anomalies occur is
vulnerable to more of the same over time.
Where does the soil go? In most cases, the
soil doesn’t go much of anywhere. It shifts and reconfigures itself into a more
compact form. This is known as compaction and is responsible for the creation
of unfilled pockets underneath the soil surface. These pockets need to be
filled by something, whether it’s air, water, rocks, or more soil from above.
During certain times of the year, these cavities are filled with water, but as the soil dries out, the water disappears, leaving the cavity empty again. The cavity can remain open for a while, but eventually, it’s quite likely that the soil above it will fall into a hole, and therefore create a new hole above it, and the cycle repeats itself.
[googleadsycc adunit=”inarticle”]
Subsidence
Subsidence is a term generally reserved for large scale movement of soil, usually due to the depletion of groundwater. In extreme cases, entire city blocks have been affected. Groundwater can be vacated by a number of conditions, some man-made.
On a smaller scale, naturally-occurring
subsidence can cause your home or garage’s foundation to settle.
Fixing the Problem – Jacking up
the Garage
There are several techniques that can be
employed to fix foundation and flooring problems with garages. You will find a
number of online videos and blogs that suggest that this would be a DIY
project, but your first thought should be to contact a professional and decide
from what you learn from him whether to try any of this yourself.
This is not a task for the faint-hearted!
Mudjacking
Detached and even attached garages can be
repaired or refortified using a technique called mudjacking.
This technique is particularly useful for
garages that have settled due to an abundance of hollow spaces – voids – under
the slab floor. When the garage is lifted up, these voids can be filled, and
the garage lowered back to its original elevation. This is the quick and simple
fix, but unfortunately, this fixes only one of what could be multiple issues.
If your foundation wall is falling, and you
have an attached garage, simply filling voids will not accomplish a permanent
repair. You may need foundation piers installed to shore up the existing
fortification.
It’s amazing, but garages can be raised along
with their concrete slab floors in many cases. Factors that would prevent this
technique include:
Floors that are pitted.
Floors that are badly cracked.
Floors where the cracks are too close to the exterior walls.
[googleadsycc adunit=”inarticle”]
Raising to a Higher, Permanent
Elevation
In rare cases, sometimes a garage is so old,
has subsided so far, or is in such a flood-prone location that it must be
permanently lifted to a higher elevation.
In such extreme cases, the concrete floor
cannot be saved. The floor can remain intact, but the outer perimeter must be
broken out and removed so that the garage can be raised independently. To keep
the outer walls supported during the lifting process, a ledger board should be
installed all the way around, but it should not be a solid board, but several
at the same height.
After either temporarily cross-bracing door and window openings (or deciding to replace the doors and windows) and rebracing any walls that may have bowed out or in during the settling process, the garage can be raised with construction grade floor jacks.
While the garage is up off the foundation,
these things (and others, depending on your individual situation) should be
done:
Remove any rotten wood that will interfere with the foundation.
Remove all debris from the worksite.
Dig trenches for new footers.
Build the forms for the new concrete with plywood, and add sufficient (here’s a case where more is better) runs of 5/8s-inch rebar.
Fill in any voids in the subsoil.
Pour the concrete. Wait 24-48 hours before lowering the garage back onto its new foundation.
Preventative Measures
When a house is built on a lot, the house gets
top priority, when it comes to excavating, leveling and compacting the soil.
Soil lying outside the perimeter of the house’s footprint doesn’t get nearly as
much attention.
Unfortunately, free-standing garages,
especially if they’re built after the house has been sold, are often built on
soil that wasn’t really prepared for structure support. If you haven’t built a
garage yet, you have an excellent opportunity to make the conditions right
before you do build. Professional excavators know the regulations for soil prep
and can be relied on to get your future garage site in good shape before the
first footer is poured.
If your garage is at the bottom of a slope,
that could mean you will have problems with erosion or undermining. Try
diverting water away from the garage and observe how the water behaves after –
or even during – a hard rain.
Rain gutters are valuable aids against foundation flooding. It’s a major reason homes have basement flooding and a significant reason why garages have sinking foundations. Rain gutters should ideally empty into drain pipes, but if not drain pipes, then splash blocks that redirect the water away from the foundation.
We all know that it is considered bad form
to answer a question with a question, but before you can offer a useful answer
to the question of whether heat lamps are safe in a garage—you need to know
what they mean by a heat lamp.
Are heat lamps safe in a garage? Some types of heat lamps are safe for indoor use, and others are not. It all depends on what they use to generate heat, how well they’re constructed, and whether you’ve made the space you’re heating safe for their use.
When somebody says heat lamp, they might
mean anything from the bulb that keeps your fast food burger warm to the
popular, propane-powered patio heaters. Even a propane heater can be used
safely inside of a garage, but by the time you supply enough ventilation to
prevent carbon monoxide poisoning, you might be losing ground in your efforts
to heat the space.
Heat Lamp Safety
The term “heat lamp” can mean a lot of
different things depending on who you ask. If you search for the term on the
internet, you’ll get results that range from restaurant equipment to animal
husbandry. There are some types of heat lamps that are both safe and practical
for use in a garage, but there are others that will create health risks or fire
hazards.
[googleadsycc adunit=”inarticle”]
Every winter, we see news reports of people
who have gotten sick, started fires or even died because they used dangerous
sources to heat a closed space. Learning how to use a particular kind of heat
lamp safely is the first step to deciding what to use, where to use it, and how
to use it safely.
If you want to keep your garage warm
without taking on the work or expense of installing a forced-air or other
permanent heat source, heat lamps can be a great way to get it done. At the
same time, choosing the wrong heat lamp can lead to big problems that you’d be
wise to avoid.
Things to Look for in a Heat Lamp
There are two primary power sources that you’ll find in products described as heat lamps—electric and combustible fuels. Electric heat lamp is a term that describes everything from food service warming bulbs to the assemblies used to provide warmth while brooding chicks. On the combustible fuel side of things, heat lamp typically refers to propane-powered patio heaters.
Anytime you use a combustion-powered heat
source, carbon monoxide poisoning is a real threat. Patio heaters are designed
to heat well-ventilated areas like outdoor decks and patios, which makes them
popular with bars and restaurants that have outdoor areas. They’re also popular
with homeowners who like to entertain or relax in outdoor areas into the cooler
times of the year.
[googleadsycc adunit=”inarticle”]
While you could use a patio heater to heat
a garage, it would probably only be practical in a limited number of
situations. Heat lamp light bulbs would provide a much safer and more practical
alternative. Even electrical heat lamp bulbs need to be used appropriately to
avoid the risk of burns, fires, or electrical issues.
Choosing a Quality Electrical Heat Lamp
There are two things to consider when
you’re shopping for an electric heat lamp. The first is the light assembly. The
second is the bulb that goes into that assembly.
Some heat lamp assemblies are constructed to
provide direct heat to a small space. This type of assembly is practical for
applications like brooding baby chickens or providing heat for other animals in
a barn. Other heat lamp assemblies are designed to be hung from the ceiling to
provide enough heat to warm an entire room. You’re looking to heat your garage
on a regular or permanent basis using heat lamps; this would be your best bet.
If you choose to use heat lamps to heat
your garage, you will need to make sure that the wiring in your garage is up to
code and appropriate to the lights that you buy. You will also need to make
sure that you mount or hang the lights in a manner that makes it safe to have
them hanging overhead.
It’s always important to invest in quality
lighting assemblies. Any lighting assembly you buy should be approved by the Underwriter’s
Laboratory. They should be constructed of quality metal and ceramics rather
than plastics, and they should have a thick quality electrical cord.
[googleadsycc adunit=”inarticle”]
Heat Lamp Bulbs
One of the easiest and safest ways to use electric lights to heat a space are to take advantage of heat lamp light bulbs. You can typically find these bulbs in wattages ranging from 25 to 250. Some feature a red bulb, and others are clear. You can screw these bulbs into any existing light socket to get an instant and safe heat source.
There are some downsides to using heat lamp
bulbs to heat your garage. Even if your garage has incandescent sockets rather
than fluorescents, it is unlikely that you have enough of them to give you
ready-made access to a sufficient amount of heat through the bulbs alone.
[googleadsycc adunit=”inarticle”]
If you need or want to install additional
sockets to give yourself more options or more heating power, you need to make
sure that the socket wattages match the bulbs that you intend to use. You also
need to make sure that you place the sockets in spaces where the heat lamp
bulbs won’t present an increased fire hazard.
If you do no permanently wire the sockets, fixtures, or assemblies that you use for your heat lamp bulbs, you need to make sure that they are plugged into an AFCI or GFCI outlet. It is also a good idea to make sure that there is a working smoke detector in the space that you are heating with the bulbs. A final consideration would be to ensure that there are no stored chemicals in the area that could lead to a build-up of fumes that reach the lower explosive limit.
Is It Practical to Heat Your Garage with a Heat Lamp?
There are plenty of good options for
keeping your garage warm during the winter months. The option that will work
best for you depends on whether you want to maintain a constant temperature in
the space or warm it up quickly for times when you will be working there. It
will also depend on your level of comfort working with electricity or your
ability to provide adequate ventilation.
[googleadsycc adunit=”inarticle”]
At the end of the day, only you can decide
which approach makes the most sense for you, your space, and the amount of heat
that you want or need. The goal of this article was to highlight important
safety concerns associated with some of the more popular options that are
available to you. We focused on the easiest to purchase and install in the
belief that more permanent or complicated solutions would involve professional
installation and an accompanying safety briefing.
Conclusion
The most important thing to consider when
you’re trying to heat your garage is whether or not you’ll be able to do what
you need to do in that space and walk away when the job or activity is done.
Carbon Monoxide build-up, electrical fires, and other disasters are very real
concerns when you try to find inventive ways to heat an indoor space during the
winter months. Be sure that whatever you do to heat your garage isn’t going to
cost you more in the long run or worse.
The garage is often not just a space for
parking your car; it can also be a workshop, laundry room, storage dump, or
even a craft center. Therefore, the design of the garage should accommodate all
its uses.
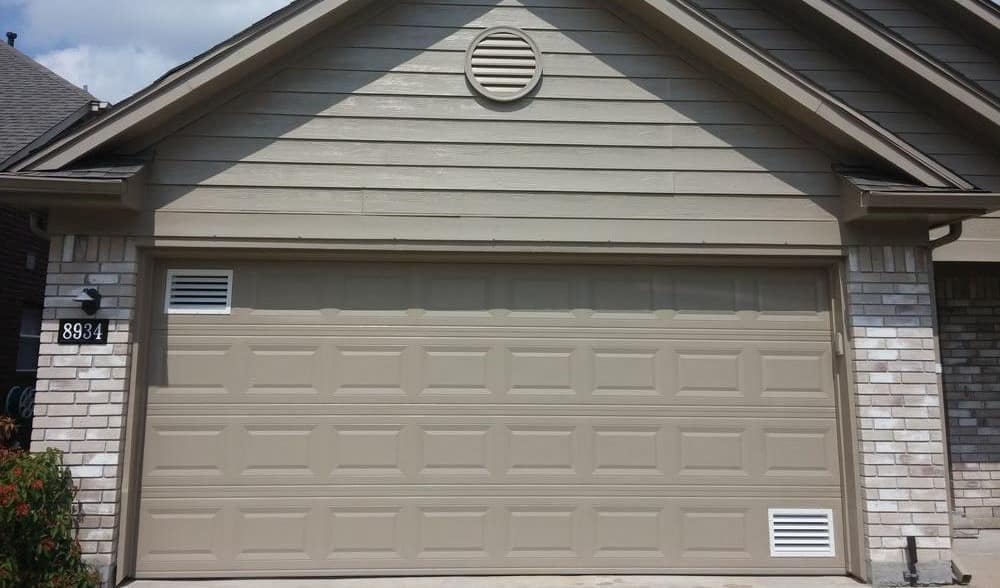
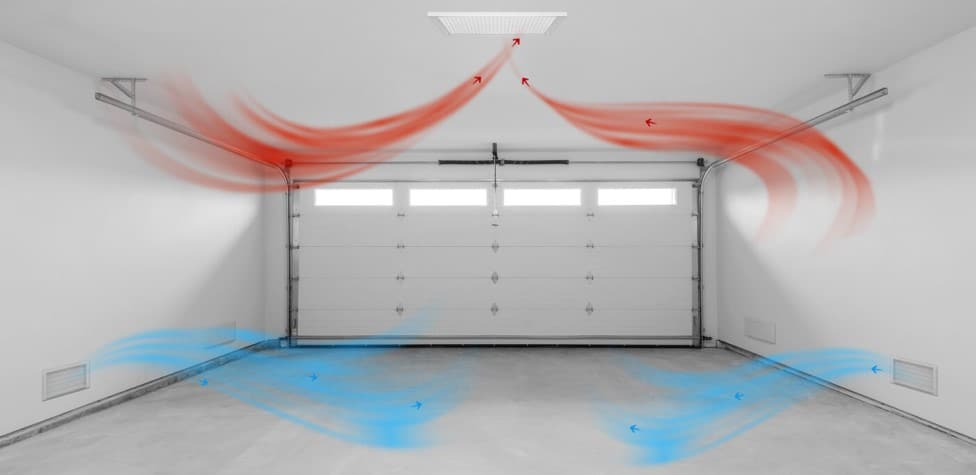
Do garages need to be vented? Yes, the garage space requires proper
ventilation to improve airflow and prevent the buildup of airborne substances
and carbon monoxide. Garages in flood-prone areas require ventilation to allow
water to pass through with little obstruction.
There are many
benefits of having proper ventilation in the garage. In addition, homeowners
need to understand the different types of vents they can install in their
garages.
The Importance of Garage Ventilation
Homeowners are increasingly becoming aware
of the importance of proper ventilation in their garages. A garage with poor
ventilation presents many dangers.
Lack of ventilation in your garage can trap
dangerous fumes and carbon monoxide, which is a health hazard. It may also lead
to the buildup of heat in the garage and make the space stuffy.
[googleadsycc adunit=”inarticle”]
Minimizes Heat Extremes
Lack of ventilation could cause heat to
buildup in your garage. The buildup of heat is not suitable for the chemicals
you keep in your garage.
The heat that has built up in your garage may also radiate to the interior of your house through common walls between the garage and the inner rooms. Therefore, your air conditioner will be strained to keep the interior rooms cool.
Garage vents allow heat to escape from the
garage, which not only cools the garage, but it also cools the interior rooms
in your house. In addition, the vents prevent your home cooling systems from
straining.
Eliminates Odors
Many homeowners keep items ranging from
auto fluids to food in their garages. These products often produce fumes, which
can be dangerous in some cases.
Lack of ventilation in your garage can
cause the food and the chemicals to deteriorate faster and produce all kinds of
odors. Proper ventilation improves air circulation and keeps the fumes out of
your garage.
[googleadsycc adunit=”inarticle”]
Reduces Carbon Monoxide Buildup
Whenever you run your car engine, whether
to turn on the air conditioner or heat in your car, it releases carbon monoxide
into your garage. Without proper ventilation in your garage, the released
carbon monoxide eventually enters the other rooms in your home.
Carbon monoxide can cause a wide range of
health problems. Installing vents in your garage can prevent such buildup of
dangerous fumes.
Improves Air Quality
Many homeowners are increasingly becoming aware of the importance of indoor air quality in their homes. Installing garage vents is one of the best ways to improve indoor air quality, not just in the garage but also in your entire home.
Garage Ventilation Tips
Garage ventilation does not only improve
comfort in your home, but it also enhances safety. Lack of ventilation in the
garage can cause heat buildup, which can make the space extremely uncomfortable
to be in.
[googleadsycc adunit=”inarticle”]
A poorly ventilated garage can also be a
safety hazard due to the buildup of dangerous exhaust fumes. The fumes may also
attach to the walls and cause stains.
Open Doors and Windows
Be sure to open all doors and windows in
your garage to improve air circulation. If your garage has windows, make sure
you keep them open as long as possible.
Opening doors and windows in your garage
help to improve air circulation, which rids the garage of fumes from car
exhaust and items such as paint that you keep in your garage. Always open the
garage door when dealing with paint or chemicals.
[googleadsycc adunit=”inarticle”]
Exhaust Fans
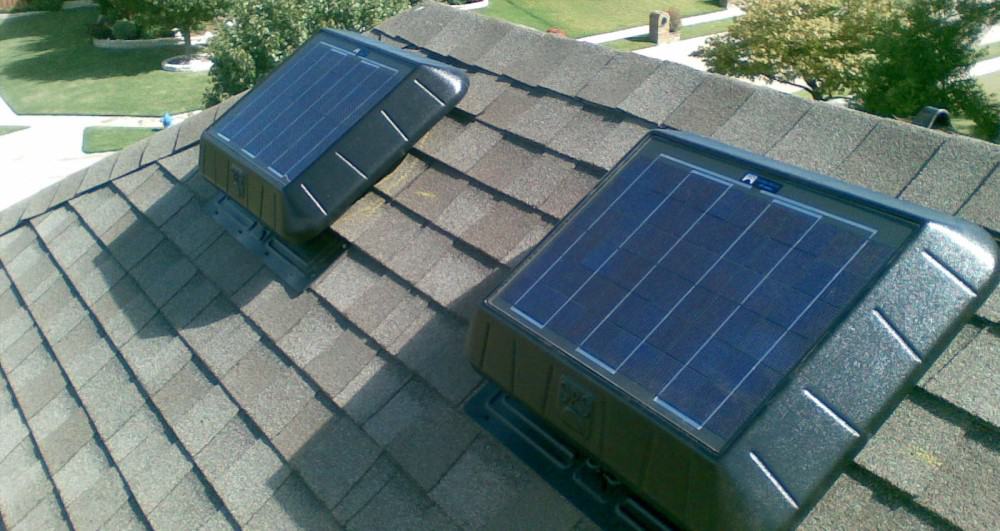
Consider installing a garage exhaust fan to minimize heat buildup in your garage. The fan may be installed on the roof or the garage wall, depending on your preference.
As the name suggests,
a roof turbine vent is installed on the roof. It features a spinning dome that
pulls stale air out of the garage to allow fresh air to get into the space.
On the other hand, a
static vent is usually installed on the walls of the garage. It features angled
stats to prevent rainwater from getting in but allow fumes and stale air to get
out.
Types of Garage Fans
You could install two main types of fans in
your garage:
Your specific needs and preferences
determine the type of fan you choose to install in your garage.
Roof-Mounted Fans
During summer, the sun can heat the roof of
your garage. Your garage can quickly become unbearably hot without proper
insulation and air circulation.
A roof-mounted fan can keep your garage cool all day. This type of fan is ideal for the garage that does not have windows or other forms of ventilation.
Interior-Mount Fan
This type of fan can be mounted on a sidewall to improve air circulation in your garage. It is suitable for all kinds of garage designs.
Powered Garage Fans
When you have a garage with attic space
above it, consider installing a fan that can keep the garage and attic space
cool. Powered garage fans can pull stale air out of the garage and attic spaces
and allow fresh, clean air in.
[googleadsycc adunit=”inarticle”]
Factors to Consider When Installing Ventilation Systems in Your Garage
There are many types of ventilation systems
on the market that you could install in your garage. Your needs and preferences
determine the type you choose.
Consider various factors when installing a
ventilation system in your home.
Air Tightness
Many garage spaces have open spaces that allow air to leak in and out of the garage. This may affect the energy efficiency of your entire home.
If you notice draft in your garage, you may
probably have an air leak problem. The best thing to do to improve the energy
efficiency of your home is to seal the leaks and install a ventilation system.
Although some homeowners may be concerned
about airtightness once they seal the leaks in their garages, a sound
ventilation system should prevent the garages from becoming tightly packed with
air.
[googleadsycc adunit=”inarticle”]
Ventilation
A good ventilation system is one of the easiest ways to let your garage breathe. It may be as simple as installing a fan in the garage to pull stale air out of the garage.
For homeowners with a little more to spend,
a high-powered vent and outlet fan can improve ventilation significantly. Vents
and fans do not only improve air circulation in your garage, but they can also
reduce heating and cooling costs.
Sealing Ducts
Some homeowners install ducts to keep their
homes cool or warm. The downside is that ducts can leak significant amounts of
air.
Some homes feature hidden ducts that may be
hard to find. In such cases, consider calling a professional to help you
identify the locations of the ducts in your home and seal them.
Cooling
Several options of garage cooling systems are available. The most convenient is a window air conditioner designed to cool a room fast.
Other options include large ceiling fans and vents to pull hot air up and out of the garage. You could also buy a standing air conditioner, which is mobile and does not require installation.
However, experts often do not recommend
standing air conditioners for garages because they provide a temporary
solution.
[googleadsycc adunit=”inarticle”]
Insulation
Insulation alone will not solve the air
circulation problem in your garage. Consider installing additional vents to
improve airflow in your garage.
A popular type of insulation in many homes is fiberglass. Although there are many types of insulation you can use in your home, many homeowners prefer fiberglass because of its excellent quality and durability.
Garage door openers are simple tech inventions,
in theory. All they are supposed to do is get your garage door to open and
close without getting your hands dirty–and maybe also light the way.
Unfortunately, tech is only really good if it’s working without a hitch.
What do you do if your garage door opener’s
light keeps staying on? This issue is usually caused by your garage door’s
light button on your remote, or by a small problem on your garage door’s
circuit board. Both are relatively easy fixes.
This pesky little problem is more of a nuisance
than anything else, but that doesn’t mean that you should ignore it. This
article will help you understand what’s going on with your garage door opener
and how you can fix it in a snap.
Why Is My Garage Door Light Staying On?
It goes without saying that garage door lights
shouldn’t be a constant thing. The general idea of a garage door light is to
provide a little illumination while you park your car or get out of your
garage. It shouldn’t stay on 24/7, and keeping them on can end up burning out
your light’s bulb.
[googleadsycc adunit=”inarticle”]
For the most part, garage door lights that don’t
turn off are caused by one of two things:
Pressing The Wrong Button On Your Remote
Low Batteries In Your Remote
A Circuitry Issue In Your Garage Door’s Equipment
A quick diagnostic is all you need in order to
figure out your fix. Heres what every homeowner should know before they get too
aggravated.
Doing Your Diagnostic
Since there are really only two reasons why a
garage door might stay open, it’s easy enough to figure out what you will need
to do to fix things. The diagnostic itself requires only two pieces of
equipment: your garage door remote and some batteries.
[googleadsycc adunit=”inarticle”]
When Should You Not Worry About Your Garage Door Light?
If you have a new garage door, then seeing a
“laggy light” might take you by surprise. In these cases, you probably should
worry. The average garage door light is set up to stay on for approximately
four minutes, so if yours shuts off around or prior to that time, it’s actually
fairly standard.
You should be more concerned about a garage door
light that just doesn’t shut off at all, turns on at random, or takes hours to
shut off. This is indicative of an electrical failure.
Step One: Diagnosing Your Garage Door Remote
The fastest and easiest fixes come from a garage door remote-related issue, so let’s tackle that possibility first. To do this, follow these steps below:
Press your garage door remote’s light button. It’s a simple task, but it’s a good one to try. You’d be surprised how often a press made in error causes the lights to seemingly stay on without reason. If the light goes off, this was the issue all along.
If you have a specialty “prolonged light” button on your remote, press that one too. If your issue isn’t fixed and your remote has a button that keeps the light on for longer periods of time, try that button as well. This can be a similar root cause.
If your setup has a motion sensor that keeps lights on, turn the motion sensor off. It’s a simple mistake, but it is surprisingly common. Most homeowners aren’t used to motion-sensing garage door lights quite yet, which makes this command an afterthought to many.
Next, replace the batteries in your garage door remote. Believe it or not, batteries that are in the process of going bad can send faulty signals to your garage door. This will often manifest as a light that won’t turn on, lights that flicker, or a remote that needs multiple presses to work.
[googleadsycc adunit=”inarticle”]
Step Two: Diagnosing The Circuit Board
If you’ve followed through with the diagnostic
process with little to show for it so far, don’t worry. This just means that
you’ve managed to narrow down the source of the problem to the circuit board.
This means that you can figure out what needs to be done. Here’s how:
Before you try to move any of the wires, disconnect the power from your garage door. A connected wire is a dangerous wire, even if it’s off. Reset your door timer to the fastest setting, so you can spend less time waiting for the light to turn off.
Disconnect door controls from the wire. You don’t want to have to constantly see your doors dancing around during this.
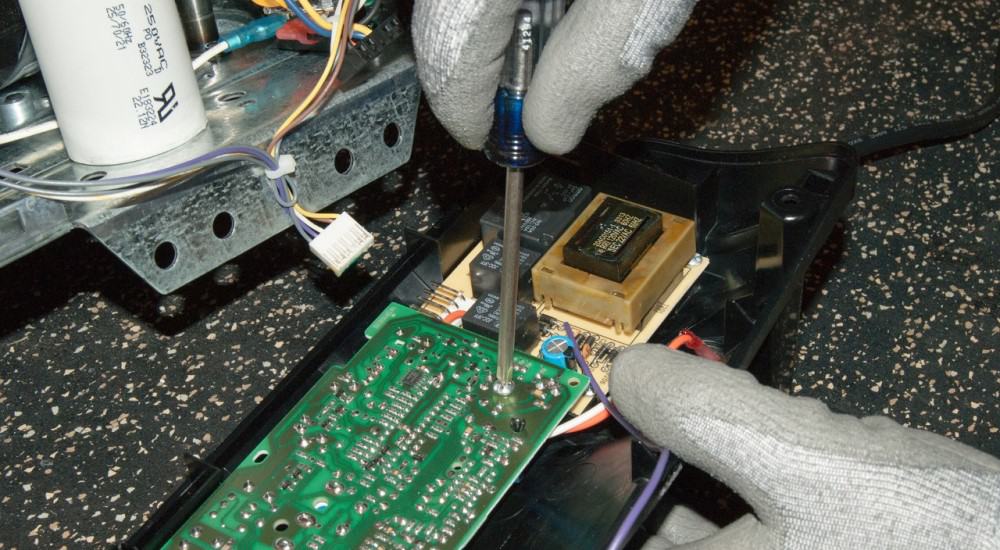
Give your circuit board a reboot. Circuit boards get wonky from time to time. Sometimes, a quick refresh is all you need to make your garage light turn off once more. Just give your circuit board two minutes before restoring power, then test it again. If the lights go off, it’s a wiring issue or a door control problem.
If the light continues to stay on, remove power from the circuit again. This suggests that the issue you’re facing has to deal with the logic board rather than the control itself. This may require professional replacement.
Once you know what caused your problem, you can
start fixing it.
[googleadsycc adunit=”inarticle”]
Watching For Wiring Issues
Wiring tends to be the most common non-remote
issue that could force a garage door light to stay on. Thankfully, it can be
fairly easy to see which wire needs replacing. Just follow these steps
below:
Check the circuit board’s
surroundings for signs of environmental damage. Did your garage recently flood or have a leak in the
ceiling? If so, you might see water marks or rust marks near the circuit
board. Water damage can harm garage door boards irreparably. Replacing
your circuit board can fix this.
Look for frayed wiring on the
circuit board or nearby. Over time,
wiring can become loose and frayed regardless of how well you keep up your
garage. If you notice frayed wiring, wrapping it up or replacing the wire
can fix your garage door light.
Search for rust on wires. Rusty wires are rare, but they’re still highly
problematic and risky. If you notice rust, it’s a sign that you’ve been
dealing with a faulty wire setup for a while.
Take a look at wires that are
connected to lighting, and just replace those. If all else fails, the easiest way to make sure your
garage door works well is to just replace the wires with a clear
connection to the lighting setup. Most door kits will have the wiring
spots labeled or obviously connected to lighting, which makes this an easy
option.
If your garage door has been giving you nonstop
grief or has shown serious signs of advanced wear, a quick fix is not enough to
make your door workable. Serious problems, especially when it comes to matters
of wiring, can pose a risk to your home as well as interrupt operation.
Any time you see a frayed wire or severe rust,
you should pause for a moment. These kinds of issues can create conditions that
increase the risk of an electrical fire and should be taken seriously. It only
takes a single errant spark to make your garage door light on fire!
When you see serious rust, heavily frayed wires,
or anything else that could be interpreted as a fire hazard, it’s better to
replace your control board and garage door setup. It may seem extreme, but it’s
better for your home’s overall safety.